-
 DIY: Video master classes
-
 Aromatherapy
-
 Felting master classes
-
 Eating at home
-
 DIY cosmetics for children
-
 Cooking recipes
-
 Detergents, cleaning products with your own hands
-
 Soap making as a business
-
 Natural cosmetics. Raw materials for cosmetics and soap.
-
 Natural oils in cosmetics
-
 News
News
-
 Recipes for balms and conditioners
-
 Bath Bomb Recipes
-
 Cream recipes. Cream making.
-
 Lotion recipes. Gel recipes.
-
 Mask recipes
-
 Soap recipes. Base soap. Soap from scratch.
-
 Recipes for all occasions
-
 Natural shampoo recipes
-
 Healthy Nutrition Recipes
-
 Scrub recipes. Massage tiles. Ubtan
-
 DIY candles
-
 Reference materials, questions, tips
-
 Startup - soap production
-
 Hair care. Tips, recipes
-
 Facial skin care. Cleansers.
-
 Body care. Tips, recipes
-
 Photo Reviews
-
 Chocolate Handmade


Hypoallergenic Azulene Cream HELLO, Recipe and Benefits of Use
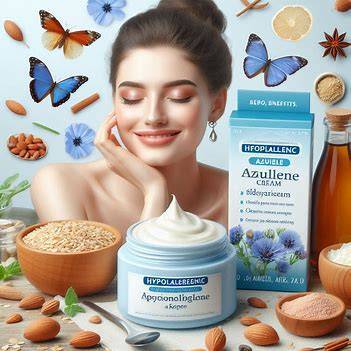
Before we delve into the recipe, let's explore the star ingredient: azulene. Derived from chamomile, this potent compound has been used for centuries to soothe and calm irritated skin. Its anti-inflammatory and antioxidant properties make it a valuable asset in skincare formulations.
Benefits of Azulene:
- Anti-inflammatory: Reduces redness and swelling.
- Antioxidant: Protects skin from free radical damage.
- Soothing: Provides relief from itching and irritation.
- Healing: Promotes skin regeneration and repair.
Recipe for HELLO Hypoallergenic Azulene Cream
Note: This recipe is a general guide. For commercial production, rigorous testing and adherence to cosmetic regulations are essential. Always consult with a qualified chemist or cosmetic formulator.
Ingredients:
- Distilled water
- Glycerin
- Emulsifying wax NF
- Cetyl alcohol
- Stearic acid
- Azulene oil
- Chamomile extract
- Allantoin
- Vitamin E oil
- Preservative (e.g., Phenoxyethanol)
Equipment:
- Glass beaker
- Double boiler
- Measuring cups and spoons
- Spatula
- Hand blender
- Sterilized containers
Instructions:
-
Phase A:
- In a glass beaker, combine distilled water, glycerin, and emulsifying wax NF.
- Heat the mixture in a double boiler until the wax is completely melted and the mixture is clear.
-
Phase B:
- In another glass beaker, combine cetyl alcohol, stearic acid, and azulene oil.
- Heat this mixture in a double boiler until the solids are melted.
-
Emulsification:
- Slowly pour Phase B into Phase A while stirring continuously.
- Allow the mixture to cool slightly before using a hand blender to create a smooth emulsion.
-
Cool Down and Add Ingredients:
- Continue stirring as the mixture cools to room temperature.
- Once cooled, add chamomile extract, allantoin, and vitamin E oil.
- Finally, incorporate the preservative.
-
Packaging:
- Transfer the cream into sterilized containers.
- Store in a cool, dark place.
 Tips for Creating a Successful Formula
- Choose high-quality ingredients: The quality of your ingredients directly impacts the effectiveness and stability of your cream.
- Sterilize equipment: Proper sanitation prevents contamination.
- Patch test: Before widespread use, test the cream on a small area of skin to check for allergies.
- Consider pH: The pH of your cream should be around 5.5 for optimal skin compatibility.
- Stability testing: Conduct stability tests to ensure the cream's shelf life and consistency.
Benefits of Using HELLO Hypoallergenic Azulene Cream
- Soothes and calms irritated skin: Azulene's anti-inflammatory properties provide relief from redness and itching.
- Hydrates and nourishes: Glycerin and hyaluronic acid help to retain moisture.
- Protects from environmental damage: Vitamin E acts as an antioxidant to shield the skin.
- Promotes skin healing: Allantoin aids in skin regeneration and repair.
Remember: While this recipe provides a foundation, customization is key to creating a product that perfectly suits your target audience. Experiment with different ratios of ingredients, add essential oils for fragrance, or incorporate other beneficial actives to tailor the cream to specific skin concerns.
Disclaimer: This information is provided for educational purposes only and should not be considered medical advice. Always consult with a healthcare professional for any skin concerns.
Would you like to explore other ingredients or formulations for your hypoallergenic cream?


Cosmetic ingredients and professional formulation blog
This section features expert materials on modern cosmetic actives. We cover peptides, polynucleotides PDRN, different forms of hyaluronic acid, retinoids, ceramides and other key components.
Special focus is given to active stability, ingredient compatibility and correct incorporation into formulas. You will find practical guides on working with anti-age actives, moisturizing complexes and barrier repair ingredients.
We examine how to properly combine myorelaxants with peptides, common mistakes when using unstable vitamin C forms and ways to improve the performance of moisturizing actives.
Separate materials are dedicated to base oils, extracts, emulsifiers and supporting ingredients. This helps create stable and effective formulas for both professional and home cosmetics.
The blog regularly publishes reviews of trending actives, comparisons of similar ingredients and step-by-step formulation recommendations. The content is aimed at formulators, technologists and anyone seriously involved in creating cosmetic products.
Why this blog is useful
Here you will find practical data on eye area care actives, lifting systems and ingredients that improve skin firmness and tone. We rely on real formulation experience and address the actual challenges that arise during product development.
You can also explore materials on skin protection and repair, depigmentation and anti-inflammatory actives. This approach supports a more systematic selection of ingredients.
FAQ
What topics are covered most often
The blog focuses on peptides, PDRN, hyaluronic acid of different molecular weights, retinoids, ceramides and their compatibility rules.
Are there practical recommendations on how to incorporate actives
Yes, most articles include practical notes on pH stability, incorporation temperature and common formulation mistakes.
Is the content only for professionals
The materials are useful both for formulators and technologists and for those who create cosmetics for personal use and want to understand how modern ingredients work.
Where can I go directly to the ingredients
All key actives are collected in the Actives section, while base components are available in base oils and related categories.