-
 DIY: Video master classes
-
 Aromatherapy
-
 Felting master classes
-
 Eating at home
-
 DIY cosmetics for children
-
 Cooking recipes
-
 Detergents, cleaning products with your own hands
-
 Soap making as a business
-
 Natural cosmetics. Raw materials for cosmetics and soap.
-
 Natural oils in cosmetics
-
 News
-
 Recipes for balms and conditioners
-
 Bath Bomb Recipes
-
 Cream recipes. Cream making.
-
 Lotion recipes. Gel recipes.
-
 Mask recipes
-
 Soap recipes. Base soap. Soap from scratch.
-
 Recipes for all occasions
-
 Natural shampoo recipes
-
 Healthy Nutrition Recipes
-
 Scrub recipes. Massage tiles. Ubtan
-
 DIY candles
-
 Reference materials, questions, tips
-
 Startup - soap production
-
 Hair care. Tips, recipes
-
 Facial skin care. Cleansers.
-
 Body care. Tips, recipes
-
 Photo Reviews
-
 Chocolate Handmade


Scrubs and peels: how to use abrasives correctly
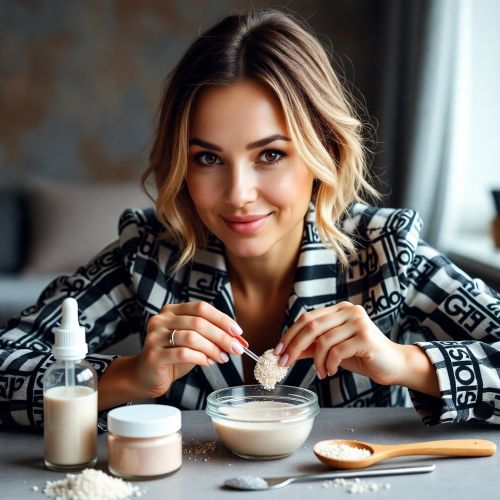
 Scrubs and peels how to properly work with abrasives is a fundamental topic for anyone interested in high-quality skincare. Exfoliation is the process of removing dead skin cells from the surface of the epidermis to reveal fresher and more radiant skin underneath. While the concept seems simple the execution requires a deep understanding of particle geometry and skin physiology. Using the wrong abrasive or applying too much pressure can lead to micro-tears and chronic inflammation while the correct formulation can transform skin texture and improve the absorption of subsequent treatments.
In this comprehensive guide we will explore the nuances of mechanical exfoliation. You will learn how to select the right exfoliating agents for different skin types and discover three professional-grade recipes that prioritize skin integrity. By mastering the art of working with abrasives you can create products that offer a superior experience compared to standard industrial exfoliants.
Beneficial Properties and Physiological Impact of Mechanical Exfoliation
The primary benefit of using scrubs and peels is the acceleration of cell turnover. As we age the natural process of desquamation slows down leading to a dull complexion and clogged pores. Mechanical abrasives physically lift away these stubborn cells instantly smoothing the skin surface. Beyond mere smoothing regular exfoliation stimulates blood circulation in the upper layers of the dermis which brings oxygen and vital nutrients to the cells.
Furthermore working with abrasives correctly prepares the skin for hydration. When the layer of dead cells is removed active ingredients like hyaluronic acid and peptides can penetrate deeper into the skin rather than sitting on a barrier of debris. Professional-grade homemade scrubs also provide the advantage of lipid replenishment; by using high-quality botanical oils as a carrier for the abrasives you can nourish the skin at the same time you cleanse it.
Advantages of Handmade Scrubs Over Industrial Analogs
One of the most significant advantages of formulating your own scrubs is the control over particle quality. Many industrial scrubs use cheap polyethylene beads or crushed walnut shells with jagged irregular edges. These irregular shapes can cause microscopic trauma to the skin barrier. When you create your own products you can choose spherical jojoba esters fine-grained sugars or mineral salts that provide effective exfoliation without the risk of scratching.
Another major advantage is the absence of synthetic surfactants and plasticizers. Commercial scrubs often contain high levels of SLS to create foam and microplastics that act as fillers which are harmful to both your skin and the environment. Homemade recipes allow you to use hydrophilic oils and natural emulsifiers that turn into a milky lotion upon contact with water ensuring that the abrasive rinses away cleanly without leaving a heavy or greasy residue.
Technical Nuances of Working with Abrasive Particles
The most critical nuance in working with abrasives is the ratio of solid particles to the liquid carrier. A professional scrub should have enough slip to allow the particles to glide over the skin without dragging. If the formula is too dry the friction becomes too high and irritates the skin. If it is too liquid the particles will not have enough contact to exfoliate effectively.
Temperature management is also vital when preparing oil-based or emulsified scrubs. If you add sugar or salt to a base that is still too warm the particles will partially dissolve losing their abrasive edge. You must wait until the oil and wax mixture has cooled and reached a trace-like consistency before incorporating your solids. Additionally the pH level of the surrounding medium should be neutral to slightly acidic to keep the skin barrier stable during the mechanical stress of scrubbing.
Recipe One Hydrophilic Polishing Scrub for the Face
This formula uses fine sugar and jojoba oil to create a gentle exfoliant that transforms into a milk when rinsed off.
Composition Fifty grams extra-fine white sugar Thirty milliliters jojoba oil Ten milliliters apricot kernel oil Seven grams glyceryl oleate or mild emulsifier One gram vitamin E tocopherol Three drops lavender essential oil
Preparation Step one Mix the jojoba oil and apricot kernel oil in a clean glass beaker. Step two Stir in the glyceryl oleate until it is fully integrated with the oils. Step three Add the vitamin E and lavender essential oil stirring gently to distribute the antioxidants. Step four Check the temperature of the oil mixture to ensure it is at room temperature. Step five Slowly pour in the fine sugar while stirring constantly to prevent the formation of large clumps. Step six Transfer the mixture into a wide-mouth glass jar and let it set for two hours before the first use.
Recipe Two Magnesium Detox Salt Peel for the Body
A powerful mineral-rich peel designed to exfoliate the body and infuse the skin with magnesium while removing toxins.
Composition Sixty grams fine Epsom salt Twenty grams Dead Sea salt Twenty milliliters sweet almond oil Ten milliliters fractionated coconut oil Five grams cetyl alcohol for texture Two drops peppermint essential oil
Preparation Step one Melt the cetyl alcohol with the coconut oil in a water bath until completely liquid. Step two Remove from heat and stir in the sweet almond oil to lower the temperature of the mixture. Step three Wait until the oils have cooled to a thick creamy state but are not yet solid. Step four Combine the Epsom salt and Dead Sea salt in a separate bowl to create a multi-sized abrasive blend. Step five Incorporate the salt blend into the thickened oils and add the peppermint essential oil for a cooling effect. Step six Whip the mixture slightly with a glass rod to create a fluffy aerated texture before bottling.
Recipe Three Antioxidant Coffee Gommage for Cellulite Support
This recipe uses freshly ground coffee and shea butter to stimulate circulation and smooth areas prone to uneven texture.
Composition Forty grams finely ground organic coffee Twenty grams organic shea butter Fifteen milliliters grapeseed oil Five grams beeswax pellets One gram rosemary antioxidant extract
Preparation Step one Melt the beeswax and shea butter together over a gentle water bath. Step two Stir in the grapeseed oil which is high in linoleic acid and provides excellent glide. Step three Remove the mixture from the heat and allow it to cool until it begins to turn opaque. Step four Add the rosemary antioxidant extract to prevent the coffee oils from oxidizing. Step five Fold in the ground coffee ensuring that every particle is coated with the lipid mixture. Step six Pour the warm gommage into a container and allow it to solidify completely at room temperature.
Professional Recommendations for Application and Use
Using scrubs and peels requires a delicate hand. Never apply an abrasive product to dry skin as this increases the risk of irritation. Always dampen the skin with warm water first to soften the stratum corneum. Apply the scrub in small circular motions using the pads of your fingers rather than the palms of your hands. The pressure should be light; let the particles do the work rather than forcing them into the skin.
For the face exfoliation should be limited to once or twice a week depending on skin sensitivity. For the body three times a week is generally acceptable. If you have active acne rosacea or broken skin you should avoid mechanical abrasives entirely in those areas to prevent the spread of bacteria or further damage to the barrier.
Storage and Maintenance of Homemade Abrasive Products
Proper storage is essential because water is the enemy of most anhydrous scrub formulas. Since these recipes often do not contain large amounts of preservatives to keep them gentle even a small amount of water introduced by wet fingers can lead to mold growth. Always use a clean dry spoon or spatula to remove the product from its jar.
Store your scrubs in a cool dry place away from the humidity of the shower when not in use. Sugar-based scrubs are particularly sensitive to heat and may melt if left in direct sunlight. Salt-based scrubs can draw moisture from the air so ensure the lid is tightly sealed after every use. When stored correctly in amber glass or high-quality opaque plastic these handmade exfoliants will remain fresh and effective for three to four months.


Cosmetic ingredients and professional formulation blog
This section features expert materials on modern cosmetic actives. We cover peptides, polynucleotides PDRN, different forms of hyaluronic acid, retinoids, ceramides and other key components.
Special focus is given to active stability, ingredient compatibility and correct incorporation into formulas. You will find practical guides on working with anti-age actives, moisturizing complexes and barrier repair ingredients.
We examine how to properly combine myorelaxants with peptides, common mistakes when using unstable vitamin C forms and ways to improve the performance of moisturizing actives.
Separate materials are dedicated to base oils, extracts, emulsifiers and supporting ingredients. This helps create stable and effective formulas for both professional and home cosmetics.
The blog regularly publishes reviews of trending actives, comparisons of similar ingredients and step-by-step formulation recommendations. The content is aimed at formulators, technologists and anyone seriously involved in creating cosmetic products.
Why this blog is useful
Here you will find practical data on eye area care actives, lifting systems and ingredients that improve skin firmness and tone. We rely on real formulation experience and address the actual challenges that arise during product development.
You can also explore materials on skin protection and repair, depigmentation and anti-inflammatory actives. This approach supports a more systematic selection of ingredients.
FAQ
What topics are covered most often
The blog focuses on peptides, PDRN, hyaluronic acid of different molecular weights, retinoids, ceramides and their compatibility rules.
Are there practical recommendations on how to incorporate actives
Yes, most articles include practical notes on pH stability, incorporation temperature and common formulation mistakes.
Is the content only for professionals
The materials are useful both for formulators and technologists and for those who create cosmetics for personal use and want to understand how modern ingredients work.
Where can I go directly to the ingredients
All key actives are collected in the Actives section, while base components are available in base oils and related categories.



