-
 DIY: Video master classes
-
 Aromatherapy
-
 Felting master classes
-
 Eating at home
-
 DIY cosmetics for children
-
 Cooking recipes
-
 Detergents, cleaning products with your own hands
-
 Soap making as a business
-
 Natural cosmetics. Raw materials for cosmetics and soap.
-
 Natural oils in cosmetics
-
 News
-
 Recipes for balms and conditioners
-
 Bath Bomb Recipes
-
 Cream recipes. Cream making.
-
 Lotion recipes. Gel recipes.
-
 Mask recipes
-
 Soap recipes. Base soap. Soap from scratch.
-
 Recipes for all occasions
-
 Natural shampoo recipes
-
 Healthy Nutrition Recipes
-
 Scrub recipes. Massage tiles. Ubtan
-
 DIY candles
-
 Reference materials, questions, tips
-
 Startup - soap production
-
 Hair care. Tips, recipes
-
 Facial skin care. Cleansers.
-
 Body care. Tips, recipes
-
 Photo Reviews
-
 Chocolate Handmade


Facial cleansing gel: gentle care for your skin with your own hands
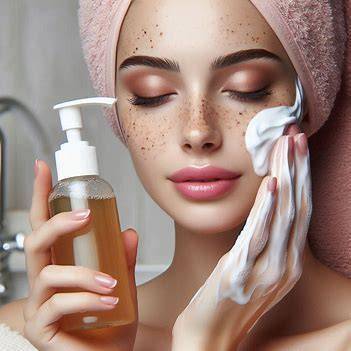 Nourishing your skin with natural ingredients is a growing trend. Making your own cleansing gel allows you to control exactly what goes on your face, avoiding harsh chemicals and fragrances. This DIY recipe is perfect for those seeking a gentle yet effective way to cleanse and refresh their skin.
Understanding Your Skin Type
Before diving in, consider your skin type. This recipe is formulated for normal to slightly oily skin. If you have dry or sensitive skin, some adjustments may be needed (see "Variations" section below).
Ingredients:
- 3 tablespoons Aloe Vera Gel (freshly harvested or store-bought)
- 2 tablespoons Distilled Water
- 1 teaspoon Castile Soap (liquid or grated bar)
- 1/2 teaspoon Vitamin E Oil
- 3 drops of your favorite essential oil (optional) - tea tree oil for oily skin, lavender oil for calming, etc.
What You'll Need:
- Small mixing bowl
- Whisk
- Funnel
- Airtight container (preferably glass)
Instructions:
- Sanitize: Wash your hands thoroughly and disinfect all your equipment with rubbing alcohol to prevent contamination.
- Combine Wet Ingredients: In your mixing bowl, whisk together the aloe vera gel and distilled water until well combined.
- Incorporate Castile Soap: Slowly add the castile soap, whisking continuously to ensure it mixes evenly and doesn't clump.
- Oil it Up: Add the vitamin E oil and, if using, your chosen essential oil. Whisk until fully incorporated.
- Transfer & Store: Using the funnel, carefully transfer the cleansing gel to your airtight container. Label it with the date and store it in the refrigerator for up to two weeks.
 How to Use:
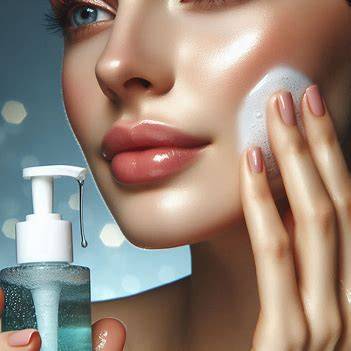
Apply a small amount of the cleansing gel to damp skin. Massage gently in circular motions, focusing on areas prone to oiliness. Rinse thoroughly with warm water and pat your face dry with a clean, soft towel. Follow with your usual moisturizer.
Variations:
- Dry Skin: Substitute 1 tablespoon of the distilled water with a hydrating ingredient like jojoba oil or honey.
- Sensitive Skin: Omit the essential oil and consider using a fragrance-free castile soap.
Benefits of DIY Cleansing Gel:
- Customization: Tailor the ingredients to your specific skin needs.
- Natural Ingredients: Avoid harsh chemicals and artificial fragrances.
- Cost-Effective: Making your own cleanser saves money compared to store-bought options.
Important Considerations:
- Freshness: Due to the lack of preservatives, this cleanser has a shorter shelf life than commercially produced products.
- Patch Test: Before applying to your entire face, do a patch test on a small area of your inner arm to check for any allergic reactions.
- Hygiene: Maintain proper hygiene during preparation and storage to prevent bacterial growth.
Conclusion:
Creating your own cleansing gel allows you to experience the satisfaction of DIY skincare while pampering your skin with gentle, natural ingredients. With a little planning and these simple steps, you can achieve a healthy, radiant complexion.


Cosmetic ingredients and professional formulation blog
This section features expert materials on modern cosmetic actives. We cover peptides, polynucleotides PDRN, different forms of hyaluronic acid, retinoids, ceramides and other key components.
Special focus is given to active stability, ingredient compatibility and correct incorporation into formulas. You will find practical guides on working with anti-age actives, moisturizing complexes and barrier repair ingredients.
We examine how to properly combine myorelaxants with peptides, common mistakes when using unstable vitamin C forms and ways to improve the performance of moisturizing actives.
Separate materials are dedicated to base oils, extracts, emulsifiers and supporting ingredients. This helps create stable and effective formulas for both professional and home cosmetics.
The blog regularly publishes reviews of trending actives, comparisons of similar ingredients and step-by-step formulation recommendations. The content is aimed at formulators, technologists and anyone seriously involved in creating cosmetic products.
Why this blog is useful
Here you will find practical data on eye area care actives, lifting systems and ingredients that improve skin firmness and tone. We rely on real formulation experience and address the actual challenges that arise during product development.
You can also explore materials on skin protection and repair, depigmentation and anti-inflammatory actives. This approach supports a more systematic selection of ingredients.
FAQ
What topics are covered most often
The blog focuses on peptides, PDRN, hyaluronic acid of different molecular weights, retinoids, ceramides and their compatibility rules.
Are there practical recommendations on how to incorporate actives
Yes, most articles include practical notes on pH stability, incorporation temperature and common formulation mistakes.
Is the content only for professionals
The materials are useful both for formulators and technologists and for those who create cosmetics for personal use and want to understand how modern ingredients work.
Where can I go directly to the ingredients
All key actives are collected in the Actives section, while base components are available in base oils and related categories.