-
 DIY: Video master classes
-
 Aromatherapy
-
 Felting master classes
-
 Eating at home
-
 DIY cosmetics for children
-
 Cooking recipes
-
 Detergents, cleaning products with your own hands
-
 Soap making as a business
-
 Natural cosmetics. Raw materials for cosmetics and soap.
-
 Natural oils in cosmetics
-
 News
-
 Recipes for balms and conditioners
-
 Bath Bomb Recipes
-
 Cream recipes. Cream making.
-
 Lotion recipes. Gel recipes.
-
 Mask recipes
-
 Soap recipes. Base soap. Soap from scratch.
-
 Recipes for all occasions
-
 Natural shampoo recipes
-
 Healthy Nutrition Recipes
-
 Scrub recipes. Massage tiles. Ubtan
-
 DIY candles
-
 Reference materials, questions, tips
-
 Startup - soap production
-
 Hair care. Tips, recipes
-
 Facial skin care. Cleansers.
-
 Body care. Tips, recipes
-
 Photo Reviews
-
 Chocolate Handmade


Handmade soap formula for consistent results
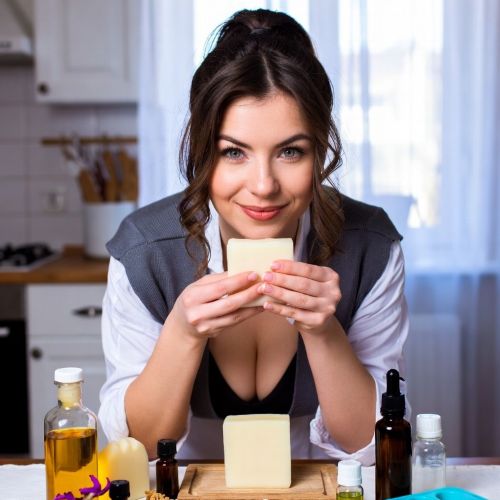 Handmade soap formulas for consistent results represent the foundation of high quality natural cosmetic production. Creating soap from scratch using the cold process method is both a chemical science and an artisanal craft. To achieve a bar that is hard, long lasting, and provides a rich lather without drying the skin, a formulator must understand the balance of fatty acids. Every oil used in soap making contributes specific properties, from the cleansing power of lauric acid to the conditioning benefits of oleic acid.
In this professional guide, we will analyze the technical requirements for developing stable soap formulations. You will learn about the chemistry of saponification and explore three precise recipes designed to yield professional results every time.
Beneficial Properties and Chemical Action of Natural Handmade Soap
The primary benefit of handmade soap is the natural retention of glycerin. During the saponification process, fats and oils react with sodium hydroxide to create soap and glycerin. In industrial production, glycerin is often removed to be sold as a separate high value byproduct. In handmade soap, this glycerin remains in the bar, acting as a powerful humectant that draws moisture to the skin.
Furthermore, handmade soap allows for a specific superfatting percentage. Superfatting is the practice of adding more oil than is required to react with the lye. This ensures that no free lye remains in the finished bar and provides extra unsaponified oils that nourish the skin. Natural soaps also utilize botanical colorants and essential oils, which offer therapeutic aromatherapy benefits and antioxidant protection that synthetic detergents cannot provide.
Advantages of Handmade Soap Over Industrial Analogs
The most significant advantage of handmade soap over industrial analogs is the absence of aggressive synthetic surfactants like sodium lauryl sulfate. Most commercial bars sold in stores are technically synthetic detergent bars rather than true soap. These detergents are designed to strip oils from surfaces efficiently, which often disrupts the human skin natural acid mantle and leads to irritation or eczema.
Another advantage is the total control over the fatty acid profile. You can formulate a bar specifically for sensitive skin by increasing the percentage of olive oil or for oily skin by adjusting the coconut oil content. Handmade soap also avoids the use of phthalates used in synthetic fragrances and parabens used as preservatives. Because soap has a high pH, it is naturally self preserving, making it one of the cleanest cosmetic products available.
Technical Nuances of Preparation for Stable Soap Formulations
Achieving a consistent result in soap making requires extreme precision in measurement and temperature control. All ingredients must be weighed in grams using a digital scale rather than measured by volume. A minor deviation in the amount of lye or oil can result in a bar that is either too soft or dangerously caustic. Safety equipment, including gloves and eye protection, is mandatory when handling sodium hydroxide.
Temperature management is the second critical nuance. The lye solution and the oils should ideally be within ten degrees of each other when they are combined. If the oils are too cold, the hard butters may solidify prematurely, causing false trace. If the mixture is too hot, the soap may overheat in the mold, leading to cracks or a rubbery texture. Using a high speed stick blender allows for efficient emulsification, ensuring that every molecule of oil comes into contact with the lye for a complete reaction.
Recipe One Balanced Daily Bar with Shea Butter and Olive Oil
This formula is designed for everyday use, providing a perfect balance of hardness, creamy lather, and skin conditioning.
Composition Four hundred grams olive oil two hundred fifty grams coconut oil two hundred grams palm oil or cocoa butter one hundred grams shea butter fifty grams castor oil one hundred forty grams sodium hydroxide three hundred thirty grams distilled water
Preparation Step one Wear safety goggles and gloves and work in a well ventilated area. Step two Carefully pour the sodium hydroxide into the distilled water while stirring until dissolved and set aside to cool. Step three Melt the coconut oil, palm oil, and shea butter in a large stainless steel pot then add the liquid olive and castor oils. Step four Monitor the temperature of both the lye solution and the oil blend until they reach approximately thirty five to forty degrees Celsius. Step five Slowly pour the lye solution into the oils while stirring with a stainless steel spoon. Step six Use a stick blender in short pulses until the mixture reaches a light trace, meaning it leaves a visible trail on the surface. Step seven Pour the raw soap into a silicone mold and tap it on the counter to remove air bubbles then cover with a lid for twenty four hours.
Recipe Two High Lather Bastille Soap for Sensitive Skin
A gentle formula with a high percentage of olive oil, reinforced with castor oil for a stable, dense foam that does not irritate the skin.
Composition seven hundred grams olive oil two hundred grams coconut oil one hundred grams castor oil one hundred twenty eight grams sodium hydroxide three hundred grams distilled water twenty grams lavender essential oil
Preparation Step one Prepare the lye solution by adding the caustic soda to the water and allowing it to cool in a safe place. Step two Blend the olive, coconut, and castor oils together and heat gently until they are fully incorporated and clear. Step three When both phases reach a temperature of thirty eight degrees Celsius, combine them in a large mixing vessel. Step four Blend with a stick blender until a thick trace is achieved, as high olive oil recipes take longer to set. Step five Stir in the lavender essential oil by hand to ensure the scent is evenly distributed throughout the batch. Step six Pour into individual bar molds and allow the soap to sit undisturbed for forty eight hours. Step seven Unmold the bars and place them in a dry area to cure, as this specific recipe requires a longer drying time to achieve maximum hardness.
Recipe Three Detoxifying Charcoal and Tea Tree Facial Soap
A specialized bar formulated for oily and acne prone skin, utilizing activated charcoal to draw out impurities.
Composition three hundred grams olive oil three hundred grams coconut oil three hundred grams sunflower oil one hundred grams cocoa butter one hundred forty two grams sodium hydroxide three hundred thirty grams distilled water ten grams activated charcoal powder fifteen milliliters tea tree essential oil
Preparation Step one Sanitize all equipment and prepare the lye solution with water in a heat proof container. Step two Melt the cocoa butter and combine it with the olive, coconut, and sunflower oils. Step three Mix the activated charcoal powder with a small amount of the oil blend to create a smooth black paste without lumps. Step four Combine the lye water with the main oil phase when temperatures are equalized. Step five Add the charcoal paste to the soap batter and use the stick blender until the color is deep black and uniform. Step six Incorporate the tea tree essential oil during the final stage of mixing for its antibacterial properties. Step seven Pour the batter into a loaf mold and insulate with a towel to encourage a full gel phase, which deepens the black color.
Detailed Recommendations for Use and Curing Process
The most important step after making soap is the curing process. Even though the soap is hard after twenty four to forty eight hours, it is not yet ready for use. The bars must be placed on a ventilated rack in a cool, dry place for four to six weeks. During this time, the excess water evaporates, making the bar harder and longer lasting. Furthermore, the pH level of the soap stabilizes during the cure, making it much gentler on the skin.
When using handmade soap, always use a draining soap dish. Because of the high natural glycerin content, handmade soap attracts water more than industrial bars. If left in a puddle of water, it will soften and dissolve quickly. Allowing the bar to dry between uses will extend its life significantly.
Storage Guidelines and Maintaining Soap Quality
Uncured soap should be kept in a well ventilated area away from direct sunlight. Once fully cured, the bars can be wrapped in breathable packaging such as paper or cardboard. Avoid wrapping handmade soap in plastic film or airtight containers, as this can trap moisture and lead to the development of orange spots, known as DOS, which is the oxidation of the oils.
Store your finished soap in a cool, dark cupboard. If stored correctly, handmade soap can last for one to two years. Over time, the scent of essential oils may fade slightly, but the cleansing and moisturizing properties of the soap will remain intact. If you notice a rancid smell, it is a sign that the oils have oxidized and the bar should no longer be used for personal hygiene.


Cosmetic ingredients and professional formulation blog
This section features expert materials on modern cosmetic actives. We cover peptides, polynucleotides PDRN, different forms of hyaluronic acid, retinoids, ceramides and other key components.
Special focus is given to active stability, ingredient compatibility and correct incorporation into formulas. You will find practical guides on working with anti-age actives, moisturizing complexes and barrier repair ingredients.
We examine how to properly combine myorelaxants with peptides, common mistakes when using unstable vitamin C forms and ways to improve the performance of moisturizing actives.
Separate materials are dedicated to base oils, extracts, emulsifiers and supporting ingredients. This helps create stable and effective formulas for both professional and home cosmetics.
The blog regularly publishes reviews of trending actives, comparisons of similar ingredients and step-by-step formulation recommendations. The content is aimed at formulators, technologists and anyone seriously involved in creating cosmetic products.
Why this blog is useful
Here you will find practical data on eye area care actives, lifting systems and ingredients that improve skin firmness and tone. We rely on real formulation experience and address the actual challenges that arise during product development.
You can also explore materials on skin protection and repair, depigmentation and anti-inflammatory actives. This approach supports a more systematic selection of ingredients.
FAQ
What topics are covered most often
The blog focuses on peptides, PDRN, hyaluronic acid of different molecular weights, retinoids, ceramides and their compatibility rules.
Are there practical recommendations on how to incorporate actives
Yes, most articles include practical notes on pH stability, incorporation temperature and common formulation mistakes.
Is the content only for professionals
The materials are useful both for formulators and technologists and for those who create cosmetics for personal use and want to understand how modern ingredients work.
Where can I go directly to the ingredients
All key actives are collected in the Actives section, while base components are available in base oils and related categories.



