-
 DIY: Video master classes
-
 Aromatherapy
-
 Felting master classes
-
 Eating at home
-
 DIY cosmetics for children
-
 Cooking recipes
-
 Detergents, cleaning products with your own hands
-
 Soap making as a business
-
 Natural cosmetics. Raw materials for cosmetics and soap.
-
 Natural oils in cosmetics
-
 News
-
 Recipes for balms and conditioners
-
 Bath Bomb Recipes
-
 Cream recipes. Cream making.
-
 Lotion recipes. Gel recipes.
-
 Mask recipes
-
 Soap recipes. Base soap. Soap from scratch.
-
 Recipes for all occasions
-
 Natural shampoo recipes
-
 Healthy Nutrition Recipes
-
 Scrub recipes. Massage tiles. Ubtan
-
 DIY candles
-
 Reference materials, questions, tips
-
 Startup - soap production
-
 Hair care. Tips, recipes
-
 Facial skin care. Cleansers.
-
 Body care. Tips, recipes
-
 Photo Reviews
-
 Chocolate Handmade


Soap base: an analysis of all types and how to choose the best one
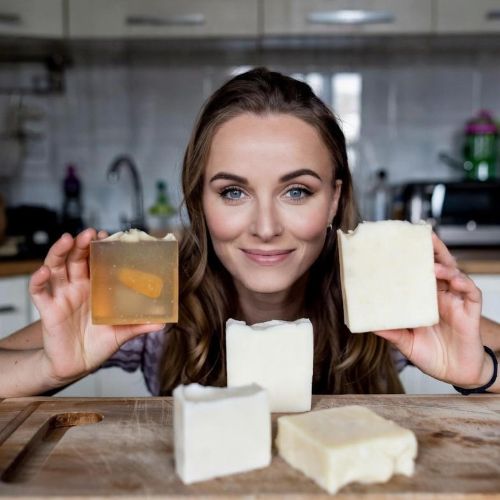 Melt and Pour soap making is the simplest and most accessible form of home cosmetic creation. The soap base is the foundation that determines the final bar's texture lather clarity and feel on the skin. While seemingly simple the market offers a vast array of bases—from ultra-clear to creamy organic to specialized formulations—each with unique properties and preparation requirements. Choosing the wrong base can result in brittle sticky or overly drying soap.
This comprehensive guide offers a detailed breakdown of all major types of soap bases explaining how their composition affects the final product and how to select the best option for your specific needs, whether for sensitive skin detailed crafting or high-end natural gifts. We detail the crucial nuances of melting adding oils and actives and provide three detailed recipes along with expert tips to ensure your homemade soap consistently outperforms generic store-bought bars.
Classification of Soap Bases Understanding the Composition
Melt and Pour soap bases are pre-saponified detergents. Their key differences lie in the type of surfactants used (some contain sulfates others do not) the presence of moisturizing agents (Glycerin and oils) and opacifiers.
1 Transparent (Clear) Soap Base
-
Composition: High concentration of Glycerin and water-soluble surfactants (often including Propylene Glycol or Sorbitol).
-
Properties: Excellent clarity allowing for bright colors and embed visibility. Lathers well.
-
Best For: Embed soaps layered designs and projects where visual transparency is key.
2 Opaque (White) Soap Base
-
Composition: Essentially a clear base with the addition of a white pigment, most commonly Titanium Dioxide.
-
Properties: Creamy appearance and a rich moisturizing lather. Often slightly softer than clear bases.
-
Best For: Soaps requiring solid color, stamping or when a traditional "milk soap" look is desired.
3 Specialty Soap Bases
These bases include specific oils or additives to enhance moisturizing properties or meet specific consumer demands.
-
Shea Butter or Goat's Milk Base: Enriched with natural fats for superior moisturizing and a very creamy lather. Ideal for dry or sensitive skin. Usually opaque.
-
SLS-Free Base: Formulated without Sodium Lauryl Sulfate (SLS) using milder alternative surfactants. Favored by those with sensitive skin or ingredient preferences.
-
Organic or Natural Base: Uses certified organic oils and often adheres to stricter formulation standards, avoiding synthetic ingredients and sometimes parabens.
Nuances of Preparation Working with Melt and Pour Base
Achieving perfect soap requires careful attention to melting temperature and the phase of additive introduction.
Melting Temperature The Key to Clarity
Never allow the soap base to boil. Boiling causes water content to evaporate resulting in a harder less moisturizing bar and potentially creating bubbles or dullness in clear bases.
-
Ideal Melting Method: Use a double boiler (bain-marie) for consistent gentle heat.
-
Microwave Method: Melt in 30-second bursts stirring between each interval. The ideal temperature for a fully melted base is around 60 to 70 degrees Celsius.
Adding Oils and Butters
Excessive oil can interfere with the base's surfactant system resulting in a greasy lather that doesn't rinse well.
-
Recommended Addition: Limit extra oils (like Jojoba or Avocado) to no more than 1 teaspoon per 500 grams of soap base. Oils should be added when the base is fully melted.
Fragrances and Actives
-
Essential Oils/Fragrances: Should be added last when the base has cooled slightly (around 55-60 degrees Celsius). High heat can degrade delicate fragrance notes.
-
Botanicals/Exfoliants: Add dried herbs coffee grounds or oatmeal just before pouring. Stir quickly to ensure even distribution and prevent them from sinking to the bottom.
Recipe 1 Ultra-Hydrating Goat's Milk Exfoliating Bar
A nourishing recipe perfect for dry and sensitive skin combining rich fats with gentle exfoliation.
Ingredients Needed
-
1 Soap Base Goat's Milk Soap Base 450 grams
-
2 Exfoliant Ground Oatmeal or Dried Chamomile Petals 1 tablespoon
-
3 Extra Oil Apricot Kernel Oil 1 teaspoon
-
4 Scent Sweet Orange Essential Oil 20-30 drops
Step-to-Step Instructions
-
Step one Chop the Goat's Milk Soap Base (450 grams) into small cubes.
-
Step two Gently melt the cubes using the double boiler method ensuring the base does not boil.
-
Step three Once fully liquid remove the base from the heat. Allow it to cool for 2-3 minutes.
-
Step four Add the Apricot Kernel Oil (1 teaspoon) and stir well to integrate.
-
Step five Add the Ground Oatmeal (1 tablespoon) and Sweet Orange Essential Oil (20-30 drops). Stir quickly just enough to distribute the particles evenly.
-
Step six Pour immediately into the mold. Spritz the top surface with rubbing alcohol to remove any surface bubbles.
Recipe 2 Simple Clear Glycerin Soap with Herb Embeds
A visually striking recipe showcasing the clarity of the Glycerin base.
Ingredients Needed
-
1 Soap Base Ultra-Clear Glycerin Base 450 grams
-
2 Embeds Dried Lavender Buds and Calendula Petals 1 tablespoon
-
3 Scent Lavender Essential Oil 20 drops
-
4 Color Water-Soluble Liquid Colorant (Blue or Purple) 3-5 drops
Step-to-Step Instructions
-
Step one Chop and melt the Ultra-Clear Glycerin Base (450 grams) using the microwave method in 30-second bursts until fully liquid.
-
Step two Remove from the microwave and allow it to cool slightly.
-
Step three Add the Liquid Colorant (3-5 drops) and the Lavender Essential Oil (20 drops). Stir very slowly to minimize air bubbles.
-
Step four Pour a thin layer into the mold and immediately spritz with alcohol.
-
Step five Once the thin layer sets slightly (creating a "bed") scatter the Dried Lavender and Calendula Petals over it.
-
Step six Reheat the remaining base briefly if it has thickened then pour the rest of the base over the embeds. Spritz the surface again with alcohol.
Recipe 3 Espresso Exfoliating Bar (Opaque Base)
Uses an opaque base for a classic creamy coffee scrub soap with a rich feel.
Ingredients Needed
-
1 Soap Base SLS-Free Opaque Base 450 grams
-
2 Exfoliant Finely Ground Coffee Grounds 1 tablespoon
-
3 Color Natural Brown Mica powder 1 teaspoon
-
4 Scent Coffee Fragrance Oil or Vanilla Essential Oil 20-30 drops
Step-to-Step Instructions
-
Step one Chop and melt the SLS-Free Opaque Base (450 grams) using the double boiler method until completely liquid.
-
Step two Remove from heat and allow to cool for 2 minutes.
-
Step three In a small cup disperse the Brown Mica powder (1 teaspoon) with a few drops of rubbing alcohol to prevent clumping. Add this mixture to the soap base and stir.
-
Step four Add the Ground Coffee Grounds (1 tablespoon) and the Fragrance Oil (20-30 drops). Stir quickly.
-
Step five The base will thicken slightly as the coffee grounds cool it. Pour immediately into the mold.
-
Step six Tap the mold gently to release air bubbles and spritz the top surface with alcohol.
Detailed Recommendations for Use and Storage
Usage Guide for Melt and Pour Soap
-
Curing Time: Melt and Pour soap does not require a curing time like cold process soap. It is ready to use once fully hardened and cooled usually within a few hours.
-
Glycerin Sweat: High glycerin content in these bases makes them hygroscopic (they attract moisture from the air). If exposed to high humidity the soap may develop tiny water droplets on the surface—this is "glycerin sweating."
-
To Prevent Sweating: Immediately after the soap has fully cooled and hardened wrap it tightly in plastic film or cling wrap. Avoid storing unwrapped soap in humid bathrooms.
Storage and Shelf Life
-
Shelf Life: Properly made Melt and Pour soap typically has a long shelf life often 1-2 years provided the added oils and botanicals are fresh and the soap is protected from moisture.
-
Actives: If you add sensitive actives (like Vitamin E or delicate extracts) consider reducing the shelf life to 6-9 months for optimal potency.
-
Storage Environment: Store wrapped bars in a cool dry dark cabinet away from direct heat or sun to maintain fragrance and color integrity.
Advantages Over Industrial Analogs
Making Melt and Pour soap at home offers key benefits surpassing generic store-bought bars:
-
High Glycerin Content: Homemade Melt and Pour soaps are naturally high in Glycerin a powerful humectant that draws moisture to the skin. Many industrial "soaps" or detergents often remove glycerin to sell separately resulting in a less moisturizing bar.
-
Ingredient Control: You ensure the bar is free from harsh surfactants artificial dyes and fragrances that can trigger sensitivity. You control the exact type of oil and the potency of added extracts.
-
Targeted Care: You can select a specialized base (e.g. Goat's Milk or SLS-Free) specifically for sensitive skin or a condition like psoriasis which is impossible with generic mass-market options.
-
Freshness and Scent: Your soap is used soon after creation ensuring the added essential oils and natural botanicals are at their freshest potency and scent profile.
Mastering the Melt and Pour technique allows you to create customized luxurious and high-performance cleansing bars that are both gentle on the skin and tailored to your exact preferences.


Cosmetic ingredients and professional formulation blog
This section features expert materials on modern cosmetic actives. We cover peptides, polynucleotides PDRN, different forms of hyaluronic acid, retinoids, ceramides and other key components.
Special focus is given to active stability, ingredient compatibility and correct incorporation into formulas. You will find practical guides on working with anti-age actives, moisturizing complexes and barrier repair ingredients.
We examine how to properly combine myorelaxants with peptides, common mistakes when using unstable vitamin C forms and ways to improve the performance of moisturizing actives.
Separate materials are dedicated to base oils, extracts, emulsifiers and supporting ingredients. This helps create stable and effective formulas for both professional and home cosmetics.
The blog regularly publishes reviews of trending actives, comparisons of similar ingredients and step-by-step formulation recommendations. The content is aimed at formulators, technologists and anyone seriously involved in creating cosmetic products.
Why this blog is useful
Here you will find practical data on eye area care actives, lifting systems and ingredients that improve skin firmness and tone. We rely on real formulation experience and address the actual challenges that arise during product development.
You can also explore materials on skin protection and repair, depigmentation and anti-inflammatory actives. This approach supports a more systematic selection of ingredients.
FAQ
What topics are covered most often
The blog focuses on peptides, PDRN, hyaluronic acid of different molecular weights, retinoids, ceramides and their compatibility rules.
Are there practical recommendations on how to incorporate actives
Yes, most articles include practical notes on pH stability, incorporation temperature and common formulation mistakes.
Is the content only for professionals
The materials are useful both for formulators and technologists and for those who create cosmetics for personal use and want to understand how modern ingredients work.
Where can I go directly to the ingredients
All key actives are collected in the Actives section, while base components are available in base oils and related categories.



