-
 DIY: Video master classes
-
 Aromatherapy
-
 Felting master classes
-
 Eating at home
-
 DIY cosmetics for children
-
 Cooking recipes
-
 Detergents, cleaning products with your own hands
-
 Soap making as a business
-
 Natural cosmetics. Raw materials for cosmetics and soap.
-
 Natural oils in cosmetics
-
 News
-
 Recipes for balms and conditioners
-
 Bath Bomb Recipes
-
 Cream recipes. Cream making.
-
 Lotion recipes. Gel recipes.
-
 Mask recipes
-
 Soap recipes. Base soap. Soap from scratch.
-
 Recipes for all occasions
-
 Natural shampoo recipes
-
 Healthy Nutrition Recipes
-
 Scrub recipes. Massage tiles. Ubtan
-
 DIY candles
-
 Reference materials, questions, tips
-
 Startup - soap production
-
 Hair care. Tips, recipes
-
 Facial skin care. Cleansers.
-
 Body care. Tips, recipes
-
 Photo Reviews
-
 Chocolate Handmade


Fat-Soluble Dyes for Candles: A Complete Guide
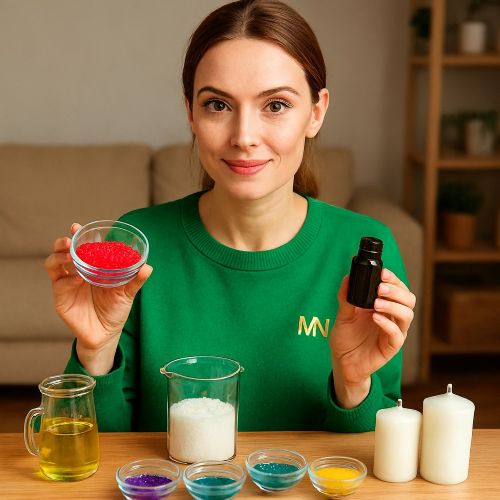 The visual appeal of a candle is the first thing a customer or hobbyist notices before the scent even reaches them. Achieving vibrant consistent and stable colors in candle making requires a deep understanding of the materials used. Fat soluble candle dyes are the professional standard for coloring both natural and synthetic waxes. Unlike food coloring or water based pigments which will separate and ruin the wax structure fat soluble dyes are chemically designed to bond perfectly with the lipid chains of the wax.
In this comprehensive guide we will explore the different forms of fat soluble dyes the physics of color saturation and the technical nuances of temperature control. By mastering these principles you can create handmade candles that feature deep rich hues and artistic gradients that are impossible to achieve with standard industrial mass production.
Understanding the Chemistry of Fat Soluble Dyes
Fat soluble dyes also known as oil based dyes are organic compounds that dissolve into hot oils and waxes without leaving sediment. They are essential because wax is a non polar substance meaning it repels anything water based. If you attempt to use liquid food coloring the water droplets will bead up at the bottom of the container or cause the candle to sputter dangerously when lit.
These dyes come in three primary forms chips liquid concentrates and powders. Dye chips are the most popular for beginners because they are easy to measure and store. Liquid dyes are highly concentrated and ideal for achieving deep saturated blacks or navy blues. Powders offer the most intense pigment but require the most skill to dissolve without leaving tiny specks of undissolved color in the wax.
Technical Nuances of Coloring Natural Waxes
Natural waxes like soy and coconut have a unique physical property they are opaque and white. This creates a pastel effect when dyes are added. To achieve a bright red in soy wax you will need significantly more dye than you would for transparent paraffin wax. Understanding this opacity is key to managing expectations for the final color.
Temperature is the most critical factor in the coloring process. If the wax is too cold the dye will not fully break down and will settle at the bottom of the mold. If the wax is too hot for too long the heat can actually break down the chemical bonds of the pigment causing the color to fade or turn a muddy brown. For most fat soluble dyes the ideal window for introduction is between seventy and eighty degrees Celsius.
Advantages of Artisanal Coloring Over Industrial Analogs
Handmade candles colored with high quality fat soluble dyes offer several benefits over factory made counterparts. Industrial candles often use cheap synthetic pigments that can release harmful fumes when burned. Artisanal dyes are typically more refined and stable.
Furthermore mass produced candles often only have a color coating on the outside a process known as over dipping. This leaves the inside of the candle white and creates an uneven look as the candle burns down. By using the techniques in this guide you will create through colored candles where the pigment is uniform from the wick to the edge of the glass. This provides a much more luxurious and high end aesthetic.
Recipe 1 Pastel Lavender Soy Jar Candle
This recipe demonstrates how to work with the natural opacity of soy wax to create a soft uniform pastel shade.
Ingredients 200 grams of container soy wax 1 lavender dye chip or 0.5 grams of dye flakes 16 grams of floral fragrance oil cotton wick.
Step one Melt the soy wax in a double boiler until it reaches eighty degrees Celsius. Step eight Add the lavender dye chip to the hot wax and stir gently but continuously for three minutes. Even if the chip appears gone continue stirring to ensure the pigment molecules are fully dispersed. Step nine Once the dye is incorporated allow the wax to cool to seventy degrees Celsius before adding your fragrance oil. Step ten Prepare your glass jar by centering the wick and ensuring the glass is clean and room temperature. Step eleven Pour the colored wax into the jar slowly at sixty degrees Celsius to avoid creating air bubbles that could disrupt the color uniformity. Step twelve Allow the candle to cool slowly at room temperature for twenty four hours to ensure the color sets without frosting.
Recipe 2 Deep Midnight Blue Coconut Blend Candle
Achieving dark saturated colors requires the use of liquid fat soluble concentrates and a specific temperature map.
Ingredients 150 grams of coconut soy wax blend 5 drops of midnight blue liquid dye 15 grams of woody fragrance oil wooden wick.
Step one Heat the wax blend to eighty five degrees Celsius as dark pigments require a higher thermal energy to bond correctly. Step eight Add the liquid dye drops directly into the center of the molten wax. Step nine Stir the wax in a figure eight motion for at least two minutes to prevent the heavy pigment from sinking to the bottom. Step ten Test the color by dropping a small amount of wax onto a white piece of paper and letting it harden. This shows you the final shade since liquid wax always looks darker than solid wax. Step eleven Add the fragrance oil at seventy five degrees Celsius and give it a final thorough stir. Step twelve Pour the wax into a ceramic vessel at fifty five degrees Celsius to ensure the best adhesion and a smooth dark finish.
Recipe 3 Multi Layered Gradient Pillar Candle
This recipe teaches the physics of layering colors using different concentrations of dye.
Ingredients 300 grams of pillar soy wax or beeswax blend 3 grams of red dye chips 15 grams of citrus fragrance oil thick cotton wick silicone mold.
Step one Divide your melted wax into three separate pouring containers. Step eight In the first container add a full gram of red dye to create a deep base color. In the second add half a gram and in the third add only a tiny sliver of a chip for a light pink. Step nine Pour the darkest layer into the bottom of the mold at seventy degrees Celsius and wait for it to form a thick skin on top but not harden completely. Step ten Pour the medium layer at sixty five degrees Celsius over the back of a spoon to break the fall and prevent the layers from mixing. Step eleven Repeat the process for the final lightest layer when the second layer has developed a firm skin. Step twelve Let the pillar cool for forty eight hours before unmolding to ensure the layers have bonded together chemically while remaining visually distinct.
Recommendations for Safe Use and Proper Storage
Handling dyes requires cleanliness and protection to ensure the quality of your cosmetic workspace.
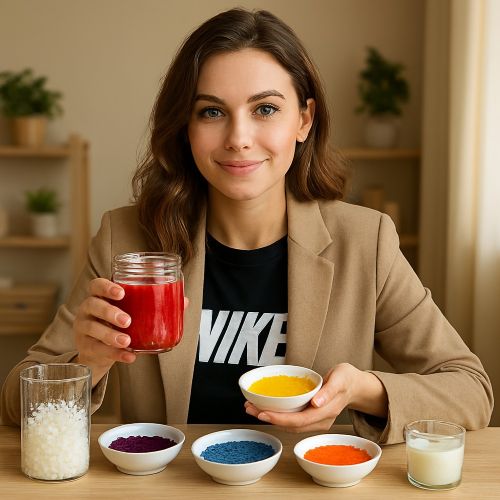
Dye Handling Safety Fat soluble dyes are extremely concentrated and will stain skin clothing and wooden surfaces instantly. Always wear gloves and cover your workspace with paper or silicone mats. If dye gets on your skin use a heavy oil like olive oil to dissolve it before washing with soap.
Protecting Color Stability UV light is the enemy of candle dyes. Natural dyes and even many synthetic ones will fade or shift color if exposed to direct sunlight for long periods. Store your finished candles in a dark cool cupboard or use UV inhibitors which are special additives that protect the pigment from sunlight.
Managing Shelf Life Fat soluble dyes in chip or liquid form have a long shelf life usually up to two years if kept in an airtight container. If you notice a liquid dye has become thick or a chip has become brittle it may not dissolve correctly and should be tested in a small batch before used for a large project.
Conclusion and Environmental Impact
Choosing fat soluble dyes for your candle making journey ensures that you are creating a product that is professional safe and aesthetically pleasing. By avoiding cheap water based alternatives you protect the integrity of the wax and ensure a clean non toxic burn. Handmade candles allow for a level of artistic expression through color that industrial manufacturing simply cannot duplicate.
Following the correct temperature protocols and mixing techniques will prevent common issues like color bleeding or sediment. This attention to detail results in a high performance product that enhances the ambiance of any space while maintaining the highest standards of safety and quality.


Cosmetic ingredients and professional formulation blog
This section features expert materials on modern cosmetic actives. We cover peptides, polynucleotides PDRN, different forms of hyaluronic acid, retinoids, ceramides and other key components.
Special focus is given to active stability, ingredient compatibility and correct incorporation into formulas. You will find practical guides on working with anti-age actives, moisturizing complexes and barrier repair ingredients.
We examine how to properly combine myorelaxants with peptides, common mistakes when using unstable vitamin C forms and ways to improve the performance of moisturizing actives.
Separate materials are dedicated to base oils, extracts, emulsifiers and supporting ingredients. This helps create stable and effective formulas for both professional and home cosmetics.
The blog regularly publishes reviews of trending actives, comparisons of similar ingredients and step-by-step formulation recommendations. The content is aimed at formulators, technologists and anyone seriously involved in creating cosmetic products.
Why this blog is useful
Here you will find practical data on eye area care actives, lifting systems and ingredients that improve skin firmness and tone. We rely on real formulation experience and address the actual challenges that arise during product development.
You can also explore materials on skin protection and repair, depigmentation and anti-inflammatory actives. This approach supports a more systematic selection of ingredients.
FAQ
What topics are covered most often
The blog focuses on peptides, PDRN, hyaluronic acid of different molecular weights, retinoids, ceramides and their compatibility rules.
Are there practical recommendations on how to incorporate actives
Yes, most articles include practical notes on pH stability, incorporation temperature and common formulation mistakes.
Is the content only for professionals
The materials are useful both for formulators and technologists and for those who create cosmetics for personal use and want to understand how modern ingredients work.
Where can I go directly to the ingredients
All key actives are collected in the Actives section, while base components are available in base oils and related categories.



