-
 DIY: Video master classes
-
 Aromatherapy
-
 Felting master classes
-
 Eating at home
-
 DIY cosmetics for children
-
 Cooking recipes
-
 Detergents, cleaning products with your own hands
-
 Soap making as a business
-
 Natural cosmetics. Raw materials for cosmetics and soap.
-
 Natural oils in cosmetics
-
 News
News
-
 Recipes for balms and conditioners
-
 Bath Bomb Recipes
-
 Cream recipes. Cream making.
-
 Lotion recipes. Gel recipes.
-
 Mask recipes
-
 Soap recipes. Base soap. Soap from scratch.
-
 Recipes for all occasions
-
 Natural shampoo recipes
-
 Healthy Nutrition Recipes
-
 Scrub recipes. Massage tiles. Ubtan
-
 DIY candles
-
 Reference materials, questions, tips
-
 Startup - soap production
-
 Hair care. Tips, recipes
-
 Facial skin care. Cleansers.
-
 Body care. Tips, recipes
-
 Photo Reviews
-
 Chocolate Handmade


How to properly incorporate peptides into creams and serums
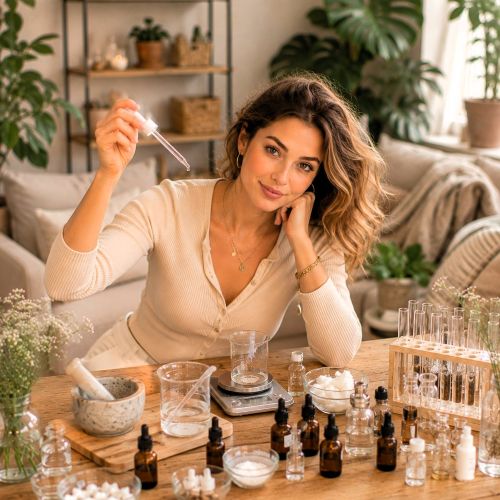 Biomimetic peptides are among the most powerful and scientifically validated active ingredients in contemporary derma-cosmetics. These precise sequences of amino acids mimic natural cellular proteins, sending targeted commands to skin cells to produce collagen, repair the moisture barrier, or relax facial muscles to soften expression lines. However, the extraordinary efficacy of peptides depends entirely on the technical skill applied during the manufacturing process. Knowing how to properly introduce peptides into creams and serums is the defining factor that separates a highly transformative anti-aging product from a completely inactive fluid.
Whether you are an aspiring cosmetic chemist or a dedicated DIY skincare creator, learning the exact molecular rules for compounding peptides allows you to develop fresh, highly concentrated treatments at home.
The Biological Power of Peptides and the Science of Dermal Signaling
Peptides operate as high-precision biological keys that unlock specific cellular pathways within the skin matrix. In a youth-sustaining formula, signaling peptides work to stimulate fibroblasts in the dermis, prompting them to synthesize fresh collagen types one and three, hyaluronic acid, and structural fibronectin. At the same time, neurotransmitter-inhibiting peptides function similarly to topical muscle relaxants, intercepting the chemical signals that cause repetitive micro-contractions in the facial muscles. This action results in a visible smoothing of fine lines around the eyes, forehead, and mouth.
When embedded within a stable, bio-compatible cream or serum vehicle, these amino acid chains enhance skin density, accelerate tissue healing, and re-establish a youthful cellular rhythm. Because they are bio-mimetic, they blend naturally with the physiological processes of the epidermis, offering profound rejuvenation without causing the severe purging or peeling often linked to aggressive chemical synthetic treatments.
Key Advantages of Custom Formulations Over Mass Market Products
Industrial mass-market skincare formulations are burdened by the necessity of long-term commercial survival. To remain stable for years on retail shelves and survive unpredictable temperature shifts inside cargo containers, commercial brands must pack their lotions with heavy artificial stabilizers, strong synthetic chelators, and aggressive chemical texturizers. While these additives maintain emulsion uniformity, they frequently form an occlusive, plastic-like film over the skin, which suffocates the natural microbiome, restricts skin respiration, and impairs the deep penetration of active molecules.
Furthermore, authentic pure peptides are exceptionally expensive raw materials sourced from specialized biotechnology laboratories. To save on production costs, industrial manufacturers regularly include these proteins at minimal percentages, just high enough to feature them in the promotional marketing material. Compounding custom peptide products at home completely removes these commercial constraints. You construct a clean, breathable, lamellar emulsion or a lightweight fluid gel using organic hydrosols and nourishing plant lipids. This allows you to introduce pristine peptide complexes at their absolute maximum therapeutic dosages, which typically ranges from three to ten percent.
Technical Challenges of Peptide Incorporation and Avoidance of Mechanical Shear
The principal challenge when working with bio-active peptide chains is managing their delicate chemical architecture. Unlike hardy cosmetic ingredients like niacinamide or glycerin, peptides possess fragile covalent bonds that hold their amino acid structures together in a highly specific configuration. If this structural shape is altered, the molecule can no longer communicate with cellular receptors, rendering the asset completely inert.
A major culprit behind peptide degradation during preparation is excessive mechanical shear stress. Utilizing high-speed industrial blenders, aggressive stick mixers, or intense laboratory homogenizers creates violent physical friction and rapid cutting forces. While this mechanical power is essential for creating tight oil-in-water emulsions, it will physically shatter the delicate protein bonds of sensitive peptides. To prevent this mechanical breakdown, you must always incorporate peptide complexes on the back-end of the formulation process, folding them into the finished base gently by hand using slow, steady strokes with a clean glass rod or a manual silicone spatula.
Critical Temperature Thresholds and the Cold Process Rule
Peptides are highly vulnerable to thermal stress. During traditional cosmetic compounding, the water phase and lipid phase must be heated to elevated temperatures on a water bath to successfully melt solid emulsifiers, structural waxes, and fatty alcohols. Introducing a peptide solution into a hot mixture at this stage will cause immediate, irreversible thermal denaturation. The heat shatters the hydrogen bonds stabilizing the protein folding structure, causing the molecule to unwind and lose all biological intelligence.
To guarantee peptide survival, you must adhere strictly to the cold process introduction rule. The cream or serum base must be completely emulsified and allowed to cool down naturally until it rests entirely at cool room temperature. Only when the base vehicle is thoroughly cool to the touch can the delicate peptide complexes be safely poured into the mixture. This technical separation of the hot emulsification phase from the cold active phase ensures that the proteins enter the formula without experiencing any thermal trauma.
Controlling Potential of Hydrogen and Ionic Compatibility
The electrical charge, chemical stability, and bio-availability of a peptide chain are dictated by the potential of hydrogen, or pH, of the surrounding fluid matrix. The vast majority of cosmetic signaling peptides and micro-peptides are engineered to remain stable and functional within a tight physiological window between five point five and六 point five pH units.
If your finished cosmetic fluid drifts into an overly acidic environment, such as a formula containing heavy doses of alpha hydroxy acids or pure ascorbic acid, the intense acidity triggers a process called acid hydrolysis. This reaction breaks the sensitive peptide links, cleaving the chain into independent, non-signaling amino acids. Similarly, a highly alkaline environment will destabilize the bonds. Before adding any peptides to a home-brewed solution, you must test the base with a calibrated digital pH meter or premium indicator strips. If the pH is out of bounds, it must be adjusted using a weak citric acid solution or sodium bicarbonate until it sits safely within the physiological window.
Recipe One The Multi Peptide Cellular Hydration Gel Serum
A crystal-clear, intensely plumping jelly serum designed to flood dehydrated tissue with multiple peptide complexes and moisture-binding polymers.
Composition Sixty five milliliters organic chamomile hydrosol Fifteen milliliters pure demineralized water Five milliliters palmitoyl tripeptide five solution Five milliliters acetyl hexapeptide thirty seven complex Five milliliters vegetable glycerin Two grams low molecular weight sodium hyaluronate powder Gentle water soluble eco-certified preservative
Preparation Step one Thoroughly sanitize your weighing scales, glass laboratory beakers, manual stirring rods, and final storage bottles with seventy percent isopropyl alcohol and allow them to air dry completely. Step two Measure your vegetable glycerin into your primary clean glass beaker, then slowly sprinkle the low molecular weight sodium hyaluronate powder directly over the fluid. Step three Blend the powder and glycerin together firmly with a glass rod until you achieve a completely smooth, uniform, lump-free paste. Step four Slowly pour the organic chamomile hydrosol and demineralized water into the paste, stirring continuously with a steady manual motion to ensure uniform hydration of the polymer. Step five Let the mixture rest undisturbed for twenty five minutes until a beautifully clear, thick, elastic gel network establishes and all air bubbles rise to the top. Step six Verify that your gel base rests completely at a cool room temperature, then slowly pour in the palmitoyl tripeptide five solution and the acetyl hexapeptide thirty seven complex. Step seven Add your safe water-soluble preservative, mix the gel gently by hand with a glass rod for one full minute, confirm using an indicator strip that the pH level balances perfectly at five point eight, and pour the serum into an opaque pump bottle.
Recipe Two The Advanced Barrier Reconstructing Lamellar Peptide Fluid
A silky, skin-identical light emulsion formulated to mirror the lipid structure of the skin while protecting neurotransmitter-inhibiting peptides from environmental breakdown.
Composition Sixty milliliters organic rose hydrosol Five milliliters acetyl hexapeptide eight solution Ten milliliters plant-derived squalane oil Five milliliters organic jojoba oil Four grams cetearyl olivate and sorbitan olivate emulsifier flakes Five milliliters pure aloe vera leaf juice fluid Safe broad spectrum cosmetic preservative system
Preparation Step one Disinfect your entire workspace, heat-resistant glassware, mechanical mini mixer, and an airless vacuum pump dispenser bottle with an antiseptic spray before starting. Step two Measure the organic rose hydrosol into your first heat-resistant glass beaker to establish the clean water phase of your fluid. Step three In your second heat-resistant glass beaker, combine the plant-derived squalane oil, organic jojoba oil, and the solid cetearyl olivate and sorbitan olivate emulsifier flakes. Step four Place both beakers into a wide, shallow water bath, heating them gently and uniformly until the emulsifier flakes melt completely into a clear liquid oil phase. Step five Remove both vessels from the water bath, slowly pour the hot water phase into the hot oil phase, and immediately blend with your mini mixer on high speed for two continuous minutes to form a stable lamellar network. Step six Switch to slow manual stirring with a clean silicone spatula and let the emulsion cool down naturally until it reaches a thoroughly cool room temperature. Step seven Once the cream base is completely cool to the touch, fold in the pure aloe vera leaf juice fluid, the delicate acetyl hexapeptide eight solution, and your broad-spectrum preservative, ensuring a final safe pH of five point five before dispensing into the airless bottle.
Recipe Three The Recovery Cica Peptide Overnight Cream-Cocoon
An intensive, deeply comforting night cream engineered to repair compromised skin barriers and soften deep expression lines using a highly stable copper peptide complex.
Composition Fifty five milliliters organic centella asiatica hydrosol Five milliliters copper tripeptide one solution Ten milliliters organic avocado oil Five milliliters organic rice bran oil Four grams natural lecithin-based emulsifying wax Three milliliters fluid gotu kola extract One gram pure vitamin E oil Gentle eco-friendly preservative compound
Preparation Step one Perform a rigorous sanitization protocol on all compounding glassware, measuring spoons, and your final cosmetic jars using a seventy percent alcohol solution. Step two Measure the organic centella asiatica hydrosol and the fluid gotu kola extract into your primary heat-resistant glass beaker to form the nutrient-dense water phase. Step three In your secondary heat-resistant beaker, combine the organic avocado oil, organic rice bran oil, pure vitamin E oil, and the natural lecithin-based emulsifying wax to form the rich lipid phase. Step bosses Warm both containers gently in a uniform water bath until the emulsifying wax dissolves completely into a clear lipid phase. Step five Pour the liquid water phase slowly into the oil phase, blending rapidly with your cosmetic mixer until a smooth, uniform cream forms. Step six Continue to stir the cream base slowly and manually with a spatula as it cools down, preventing any heavy mechanical shear forces from altering the cooling emulsion density. Step seven Once the cream base is entirely cool to room temperature, gently add the liquid copper tripeptide one solution and your preservative, stirring manually until the cream achieves a completely uniform sky-blue color, verify the pH is at六 point zero, and transfer to your sterile jar.
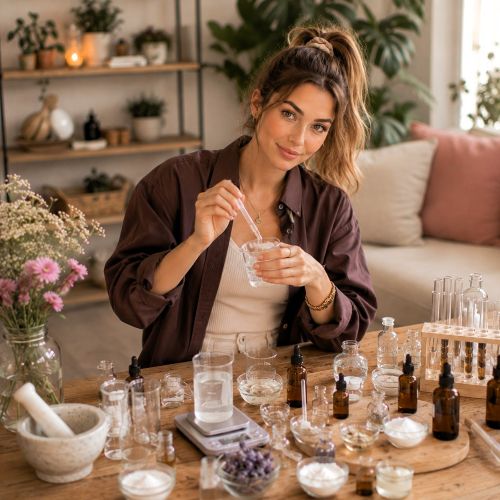
Expert Guidelines for Layering and Daily Application Techniques
To yield maximum cellular transformation from your custom-brewed peptide creams and serums, you must implement a structured and disciplined application method. Because peptides require an uncompromised pathway to bind effectively with target cell receptors, they must be applied directly to thoroughly cleansed skin, right after your daily toning step. Use your custom peptide line twice a day for consistent signaling.
Dispense an amount of your peptide serum or cream roughly equivalent to the size of a large pea onto your clean fingertips. Warm the product slightly between your hands and glide it over your face, neck, and upper chest area using smooth, upward diagonal motions. Avoid pulling, dragging, or rubbing the skin aggressively. Instead, pat and press the product firmly into your skin matrix with the palms of your hands to encourage immediate lamellar integration into the stratum corneum without stressing the protein chains.
It is absolutely crucial to maintain strict ingredient separation across your overall skincare routine. If your evening routine involves high-strength retinoids, pure chemical peeling acids, or low-pH vitamin C serums, you must never layer them at the exact same moment as your peptide cosmetics. Dedicate specific mornings to your peptide formulations, and reserve your low-pH acids or retinoids exclusively for alternate evenings. This separation shields your delicate custom peptides from chemical hydrolysis, ensuring optimal skin rejuvenation.
Professional Storage Protocol and Shelf Life Preservation
Custom handmade cosmetics prioritizing raw peptides are exceptionally vulnerable to environmental breakdown because they are intentionally free from harsh industrial chelating agents, synthetic polymers, and heavy paraben complexes. Peptide formulas must never be stored inside a damp, humid bathroom, where constant temperature spikes will rapidly trigger premature emulsion separation and peptide degradation. Always package your finished serums and creams inside dark amber glass bottles, opaque containers, or vacuum pump dispensers that completely block out ultraviolet light and eliminate airborne bacterial contamination.
Store your custom peptide collection continuously inside a temperature-controlled environment, such as a dedicated cosmetic refrigerator or a cool, dark storage cabinet. Maintaining a stable, cool climate locks the amino acid chains into a relaxed state, protects the natural plant oils from going rancid, and delivers an incredibly soothing, anti-inflammatory cooling sensation upon skin contact.
When compiled under strict sterile conditions and preserved with a reliable eco-certified preservative system, your handmade peptide product will remain completely stable and biologically potent for exactly three months. If you ever observe a sudden separation of the oil and water layers, a noticeable thinning of the gel structure, a color shift, or a distinct sour odor, discontinue use immediately. These signs indicate that the structural integrity of the formula has failed, and a fresh batch should be prepared to guarantee your absolute skin safety.


Cosmetic ingredients and professional formulation blog
This section features expert materials on modern cosmetic actives. We cover peptides, polynucleotides PDRN, different forms of hyaluronic acid, retinoids, ceramides and other key components.
Special focus is given to active stability, ingredient compatibility and correct incorporation into formulas. You will find practical guides on working with anti-age actives, moisturizing complexes and barrier repair ingredients.
We examine how to properly combine myorelaxants with peptides, common mistakes when using unstable vitamin C forms and ways to improve the performance of moisturizing actives.
Separate materials are dedicated to base oils, extracts, emulsifiers and supporting ingredients. This helps create stable and effective formulas for both professional and home cosmetics.
The blog regularly publishes reviews of trending actives, comparisons of similar ingredients and step-by-step formulation recommendations. The content is aimed at formulators, technologists and anyone seriously involved in creating cosmetic products.
Why this blog is useful
Here you will find practical data on eye area care actives, lifting systems and ingredients that improve skin firmness and tone. We rely on real formulation experience and address the actual challenges that arise during product development.
You can also explore materials on skin protection and repair, depigmentation and anti-inflammatory actives. This approach supports a more systematic selection of ingredients.
FAQ
What topics are covered most often
The blog focuses on peptides, PDRN, hyaluronic acid of different molecular weights, retinoids, ceramides and their compatibility rules.
Are there practical recommendations on how to incorporate actives
Yes, most articles include practical notes on pH stability, incorporation temperature and common formulation mistakes.
Is the content only for professionals
The materials are useful both for formulators and technologists and for those who create cosmetics for personal use and want to understand how modern ingredients work.
Where can I go directly to the ingredients
All key actives are collected in the Actives section, while base components are available in base oils and related categories.