-
 DIY: Video master classes
-
 Aromatherapy
-
 Felting master classes
-
 Eating at home
-
 DIY cosmetics for children
-
 Cooking recipes
-
 Detergents, cleaning products with your own hands
-
 Soap making as a business
-
 Natural cosmetics. Raw materials for cosmetics and soap.
-
 Natural oils in cosmetics
-
 News
-
 Recipes for balms and conditioners
-
 Bath Bomb Recipes
-
 Cream recipes. Cream making.
-
 Lotion recipes. Gel recipes.
-
 Mask recipes
-
 Soap recipes. Base soap. Soap from scratch.
-
 Recipes for all occasions
-
 Natural shampoo recipes
-
 Healthy Nutrition Recipes
-
 Scrub recipes. Massage tiles. Ubtan
-
 DIY candles
-
 Reference materials, questions, tips
-
 Startup - soap production
-
 Hair care. Tips, recipes
-
 Facial skin care. Cleansers.
-
 Body care. Tips, recipes
-
 Photo Reviews
-
 Chocolate Handmade


Candle fragrances: How to add them and which ones are the most persistent
 The soul of a candle lies in its scent. While the wax provides the body and the wick provides the life it is the fragrance that creates the atmosphere and emotional connection. However achieving a professional level scent throw where the aroma fills a room without being overwhelming is one of the most challenging aspects of candle making. Understanding the chemistry of how to add fragrances and identifying which oils are the longest lasting is essential for creating high quality products that surpass industrial alternatives.
In this comprehensive guide we will explore the science of fragrance loading temperature synchronization and the curing process. You will learn the technical nuances of working with different aromatic compounds to ensure your candles provide a consistent scent experience from the first light to the very last drop of wax.
The Chemistry of Fragrance Oils and Scent Throw
To create a fragrant candle we must understand two key terms cold throw and hot throw. Cold throw is the scent the candle emits while sitting unlit on a shelf. Hot throw is the aroma released into the air as the candle burns. The goal of every candle maker is to maximize both.
Fragrance oils are complex mixtures of natural and synthetic aromatic chemicals. When added to molten wax they must chemically bond with the lipid molecules of the wax. If the wax is too cold the oil will not incorporate and will instead settle at the bottom or seep out of the sides a phenomenon known as sweating. If the wax is too hot the fragrance molecules may evaporate or break down before the candle even sets resulting in a weak scent.
The effectiveness of a fragrance also depends on its flash point. This is the temperature at which the oil vapors can ignite. While we do not heat wax to these extremes knowing the flash point helps in understanding the stability of the oil during the heating process.
Which Fragrances Last the Longest
Not all scents are created equal. The longevity of a fragrance is determined by its molecular weight and the notes used in the composition.
Base notes are the heaviest and longest lasting molecules. These include scents like sandalwood vanilla amber patchouli and musk. Because these molecules evaporate slowly they provide the foundation of the candle scent and remain detectable for the longest duration.
Heart notes or middle notes such as jasmine rose or lavender provide the character of the fragrance. They are moderately persistent.
Top notes like citrus lemon or bergamot are the lightest. They provide the initial burst of fragrance but evaporate quickly. For a long lasting candle look for blends that are heavy on the base notes or specifically formulated as candle grade fragrance oils which contain stabilizers to help them withstand heat.
Advantages of Handmade Scented Candles Over Industrial Analogs
Industrial candles often prioritize cost over quality. They frequently use paraffin wax which has a different molecular structure that does not hold fragrance as effectively as natural waxes. To compensate factories often use synthetic binders and boosters that can release phthalates and other harmful chemicals into the air.
Handmade candles using natural soy or coconut wax allow for a higher fragrance load usually between seven and ten percent. This results in a deeper more complex aroma. Furthermore by making your own candles you avoid cheap synthetic fillers ensuring that the scent you breathe is cleaner and more authentic. You also have the freedom to cure your candles for the appropriate amount of time ensuring the scent is fully developed before the first burn.
Recipe 1 Invigorating Sandalwood and Vanilla Soy Candle
This recipe focuses on heavy base notes that ensure a long lasting and consistent hot throw.
Ingredients 200 grams of container soy wax 20 grams of sandalwood and vanilla fragrance oil cotton wick glass jar.
Step one Melt the soy wax in a double boiler until it reaches eighty degrees Celsius. This temperature is high enough to expand the wax molecules for better oil absorption. Step two Prepare your container by securing the wick and ensuring the glass is clean and dry. Step three Monitor the wax as it cools to seventy degrees Celsius. This is the optimal window to add the fragrance oil. Step four Pour the fragrance oil into the wax and stir slowly but continuously for a full two minutes. Do not skip this step as thorough stirring is required for a complete chemical bond. Step five Let the wax cool to fifty five degrees Celsius before pouring it into the glass jar to prevent surface cracks. Step six Cover the jar and allow the candle to cure in a cool dark place for at least two weeks. Soy wax needs this time for the scent molecules to fully integrate.
Recipe 2 Relaxing Lavender and Amber Coconut Blend
A blend of floral heart notes and resinous base notes for a sophisticated and enduring aroma.
Ingredients 150 grams of coconut soy wax blend 15 grams of lavender and amber fragrance oil wooden wick ceramic vessel.
Step one Melt the coconut wax blend on low heat until it is fully liquid. Coconut wax has a lower melting point so be careful not to overheat it. Step two Secure the wooden wick in the center of the ceramic vessel. Step three Add the fragrance oil when the wax is at sixty eight degrees Celsius. Step four Stir the oil into the wax in a figure eight motion to ensure even distribution without creating too many air bubbles. Step five Pour the wax into the vessel at fifty degrees Celsius. Step six Allow this candle to cure for seven to ten days. Coconut wax releases scent faster than soy but still benefits from a curing period.
Recipe 3 Pure Essential Oil Aromatherapy Candle
Using essential oils requires lower temperatures to preserve the delicate natural compounds.
Ingredients 200 grams of beeswax or soy wax 15 ml of cedarwood and orange essential oil blend thick cotton wick.
Step one Melt the wax until it is liquid. If using beeswax you will need to reach a higher temperature of around eighty five degrees Celsius. Step two Allow the wax to cool down significantly to sixty five degrees Celsius before adding the essential oils to prevent them from burning off. Step three Add the essential oils and stir gently but firmly. Step four Pour the wax into your mold or jar. If using beeswax preheat the container to prevent the wax from shrinking too fast. Step five Essential oil candles often have a more subtle scent throw but the cold throw remains very high. Step six Let the candle cure for at least one week to allow the natural oils to settle within the wax structure.
Recommendations for Professional Use and Storage
To maintain the integrity of the scent you must follow strict storage and usage protocols.
The Curing Process Curing is the most overlooked step in candle making. After pouring you must let the candle sit undisturbed. During this time the wax forms a crystalline structure that traps the fragrance oil. For soy wax a minimum of two weeks is recommended. Lighting a candle too early will result in a very weak hot throw.
Proper Storage Fragrance oils are sensitive to light and temperature. Store your finished candles in a cool dark place. Direct sunlight can cause the fragrance oils to oxidize which changes the smell and can turn the wax yellow. Always keep the lid on your candles when not in use to prevent the cold throw from fading.
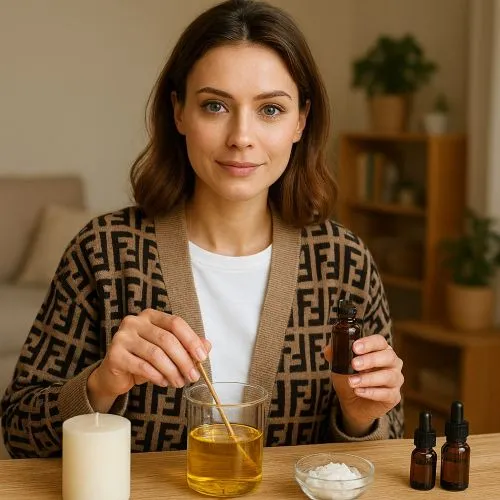
Burning Techniques To get the most out of the scent ensure the candle burns long enough to reach a full melt pool. This allows the maximum amount of fragrance to evaporate into the air. Always trim the wick to five millimeters to prevent the smell of smoke from interfering with the fragrance.
Conclusion on Fragrance Longevity
Creating a long lasting scented candle is a balance of choosing the right oils adding them at the correct temperature and allowing them the time to cure. By focusing on base notes and utilizing natural waxes you can produce candles that are not only safer for your home but also provide a far superior olfactory experience compared to industrial products.
The attention to detail in the stirring and cooling phases ensures that every candle you make will have a professional finish and a room filling aroma that stays consistent throughout the entire life of the candle.


Cosmetic ingredients and professional formulation blog
This section features expert materials on modern cosmetic actives. We cover peptides, polynucleotides PDRN, different forms of hyaluronic acid, retinoids, ceramides and other key components.
Special focus is given to active stability, ingredient compatibility and correct incorporation into formulas. You will find practical guides on working with anti-age actives, moisturizing complexes and barrier repair ingredients.
We examine how to properly combine myorelaxants with peptides, common mistakes when using unstable vitamin C forms and ways to improve the performance of moisturizing actives.
Separate materials are dedicated to base oils, extracts, emulsifiers and supporting ingredients. This helps create stable and effective formulas for both professional and home cosmetics.
The blog regularly publishes reviews of trending actives, comparisons of similar ingredients and step-by-step formulation recommendations. The content is aimed at formulators, technologists and anyone seriously involved in creating cosmetic products.
Why this blog is useful
Here you will find practical data on eye area care actives, lifting systems and ingredients that improve skin firmness and tone. We rely on real formulation experience and address the actual challenges that arise during product development.
You can also explore materials on skin protection and repair, depigmentation and anti-inflammatory actives. This approach supports a more systematic selection of ingredients.
FAQ
What topics are covered most often
The blog focuses on peptides, PDRN, hyaluronic acid of different molecular weights, retinoids, ceramides and their compatibility rules.
Are there practical recommendations on how to incorporate actives
Yes, most articles include practical notes on pH stability, incorporation temperature and common formulation mistakes.
Is the content only for professionals
The materials are useful both for formulators and technologists and for those who create cosmetics for personal use and want to understand how modern ingredients work.
Where can I go directly to the ingredients
All key actives are collected in the Actives section, while base components are available in base oils and related categories.


