-
 DIY: Video master classes
-
 Aromatherapy
-
 Felting master classes
-
 Eating at home
-
 DIY cosmetics for children
-
 Cooking recipes
-
 Detergents, cleaning products with your own hands
-
 Soap making as a business
-
 Natural cosmetics. Raw materials for cosmetics and soap.
-
 Natural oils in cosmetics
-
 News
-
 Recipes for balms and conditioners
-
 Bath Bomb Recipes
-
 Cream recipes. Cream making.
-
 Lotion recipes. Gel recipes.
-
 Mask recipes
-
 Soap recipes. Base soap. Soap from scratch.
-
 Recipes for all occasions
-
 Natural shampoo recipes
-
 Healthy Nutrition Recipes
-
 Scrub recipes. Massage tiles. Ubtan
-
 DIY candles
-
 Reference materials, questions, tips
-
 Startup - soap production
-
 Hair care. Tips, recipes
-
 Facial skin care. Cleansers.
-
 Body care. Tips, recipes
-
 Photo Reviews
-
 Chocolate Handmade


A simple recipe for facial peeling with fruit AHA acids - skin renewal and radiance
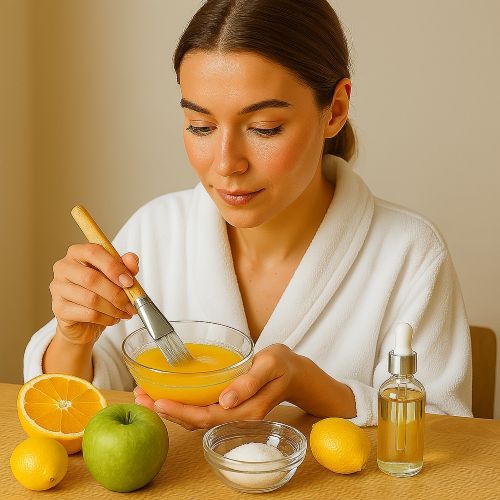 Achieving radiant, smooth, and youthful-looking skin is a common desire. As we age, our skin's natural exfoliation process slows down, leading to dullness, uneven texture, and a less vibrant complexion. This is where chemical exfoliants, particularly Alpha Hydroxy Acids (AHAs), come into play. Derived from fruits and other natural sources, AHAs are celebrated for their ability to gently dissolve the bonds between dead skin cells, revealing the fresh, glowing skin beneath.
While the market is flooded with various AHA-based peels, creating your own at home offers unparalleled control over ingredients, freshness, and customization. This article will delve into the benefits of using fruit-derived AHAs, compare homemade options to industrial products, and provide three detailed recipes for effective and safe facial peeling, complete with usage and storage recommendations.
Understanding AHA Acids and Their Benefits for Skin
Alpha Hydroxy Acids are a group of natural acids commonly found in fruits, milk, and sugar cane. They work by loosening the "glue" that holds dead skin cells together on the skin's surface, allowing them to slough off more easily. This process of exfoliation leads to a myriad of skin benefits:
- Improved Skin Texture: AHAs help smooth rough patches, refine skin texture, and reduce the appearance of fine lines and wrinkles.
- Enhanced Radiance: By removing dull, dead skin cells, AHAs reveal fresher, brighter skin, leading to a more luminous complexion.
- Reduced Hyperpigmentation: Regular use can help fade dark spots, sun damage, and post-inflammatory hyperpigmentation (PIH), promoting a more even skin tone.
- Increased Collagen Production: Some AHAs, like glycolic acid, have been shown to stimulate collagen synthesis, contributing to firmer and more elastic skin over time.
- Better Product Absorption: With dead skin cells removed, subsequent skincare products (serums, moisturizers) can penetrate more effectively, maximizing their benefits.
- Acne Improvement: While not a primary acne treatment like BHAs, AHAs can help by preventing dead skin cells from clogging pores, reducing mild breakouts.
Common fruit-derived AHAs include Glycolic Acid (from sugar cane), Lactic Acid (from milk, but can be vegan-friendly), Citric Acid (from citrus fruits), Malic Acid (from apples), and Tartaric Acid (from grapes).
Advantages of Homemade AHA Peeling over Industrial Products
- Ingredient Control: You dictate every component, ensuring your peel is free from harsh chemicals, synthetic fragrances, dyes, and excessive preservatives often found in commercial products.
- Freshness and Potency: Homemade peels are prepared in small batches, guaranteeing the freshness and active potency of the ingredients, which can degrade over time in mass-produced items.
- Cost-Effectiveness: Sourcing raw ingredients is often significantly more economical in the long run compared to repeatedly purchasing high-end commercial peels.
- Customization: You can adjust the concentration of AHAs and incorporate additional beneficial ingredients to suit your specific skin type, concerns, and sensitivity levels.
- Environmental Impact: Reducing reliance on single-use plastic packaging and utilizing natural, biodegradable components contributes to a more sustainable beauty routine.
- Transparency: No hidden "fragrance" or proprietary blends; you have full knowledge of what you're applying to your skin.
Recipe #1: Gentle Radiance Boosting Peel with Lactic Acid
This recipe is perfect for beginners or those with sensitive skin. Lactic acid is a milder AHA, known for its hydrating properties in addition to its exfoliating benefits.
Ingredients:
- Lactic Acid (80% solution): 1 ml (approx. 20 drops)
- Distilled Water or Rose Hydrosol: 20 ml
- Vegetable Glycerin: 2 ml
- Xanthan Gum (or other natural gelling agent): 0.1 g (tiny pinch)
- Allantoin (powder): 0.1 g
- Preservative (e.g., Geogard 221 or Phenoxyethanol): according to manufacturer's instructions
- pH test strips: essential for safety
Preparation:
- Sterilization: Thoroughly sterilize all your tools (beaker, stirrers, dropper, and final container) using rubbing alcohol or by boiling for 10 minutes. This is crucial for safety and preventing bacterial growth.
- Prepare Gel: In a clean beaker, disperse the xanthan gum into the vegetable glycerin. Mix well to form a lump-free slurry.
- Combine Liquids: Add the distilled water or hydrosol to the glycerin/xanthan gum mixture. Stir continuously until the xanthan gum is fully hydrated and a clear gel forms. This may take a few minutes.
- Dissolve Actives: Add the allantoin powder to the gel mixture. Stir until completely dissolved.
- Add Lactic Acid: Carefully add the lactic acid solution to the mixture. Stir well to ensure even distribution.
- Adjust pH (Crucial Step): Use pH test strips to measure the pH of your peel. For a gentle facial peel, aim for a pH between 3.5-4.0. If the pH is too low (below 3.0), add a very small amount of a diluted alkaline solution (e.g., baking soda mixed with water, drop by drop) and re-test until the desired pH is reached. If the pH is too high, add a tiny bit more lactic acid.
- Add Preservative: Once the pH is stable, add your chosen cosmetic preservative according to the manufacturer's recommended dosage. Mix thoroughly.
- Transfer: Pour the finished peel into your sterilized glass dropper bottle or pump bottle.
Application and Storage:
Apply this peel once a week, preferably in the evening. After cleansing, apply a thin, even layer to dry skin, avoiding the eye area and lips. Leave on for 5-10 minutes (start with 5 minutes and gradually increase). A slight tingling sensation is normal. Rinse thoroughly with lukewarm water. Follow with a hydrating serum and moisturizer. Store in a cool, dark place (refrigeration is recommended) for up to 1-2 months. Discard if you notice any changes in color, smell, or consistency.
Recipe #2: Brightening & Exfoliating Peel with Mixed Fruit AHAs
This recipe combines multiple fruit acids for a more comprehensive exfoliating and brightening effect. It's suitable for most skin types, excluding very sensitive ones.
Ingredients:
- AHA Fruit Acid Complex (liquid blend of Glycolic, Lactic, Citric, Malic, Tartaric acids, typically 50% concentration): 2 ml (approx. 40 drops)
- Aloe Vera Juice (organic, food-grade): 25 ml
- Propanediol 1,3 (or other humectant): 3 ml
- Sodium Citrate (pH buffer, optional but recommended): 0.2 g
- Hyaluronic Acid (low molecular weight, powder): 0.1 g
- Preservative (e.g., Liquid Germall Plus or Euxyl PE 9010): according to manufacturer's instructions
- pH test strips: essential for safety
Preparation:
- Sterilization: Ensure all equipment and containers are meticulously sterilized.
- Hydrate Hyaluronic Acid: In a clean beaker, add the hyaluronic acid powder to the aloe vera juice. Stir well and let it sit for 30-60 minutes (or until fully dissolved) to form a gel. You can speed this up by gently warming the mixture on a water bath.
- Combine Ingredients: Once the hyaluronic acid is fully hydrated, add the propanediol 1,3 and sodium citrate (if using) to the gel. Stir thoroughly.
- Introduce AHA Complex: Carefully add the AHA Fruit Acid Complex to the mixture. Stir gently but continuously to ensure even distribution.
- Adjust pH (Crucial Step): Test the pH with test strips. Aim for a pH between 3.0-3.5. Adjust as needed using a diluted alkaline solution (e.g., baking soda solution) to raise pH, or a tiny bit more AHA complex to lower it. Be very precise and adjust incrementally.
- Add Preservative: Once the pH is stable and within the safe range, add your chosen cosmetic preservative. Mix well.
- Transfer: Pour the finished peel into a dark glass bottle with a dropper or pump.
Application and Storage:
Use 1-2 times per week, in the evening. Apply a thin, even layer to clean, dry skin. Leave on for 7-15 minutes (start with shorter times, gradually increasing). You might feel a moderate tingling. Rinse off completely with cool water. Follow immediately with a soothing, hydrating moisturizer. Store in a cool, dark place (refrigeration highly recommended) for up to 1 month. Always check for changes in appearance or smell before each use.
Recipe #3: Advanced Resurfacing Peel with Glycolic Acid and Botanical Extracts
This peel is designed for experienced users of AHAs looking for more intensive resurfacing. Glycolic acid has the smallest molecular size among AHAs, allowing for deeper penetration. Botanical extracts are added for soothing and antioxidant benefits.
Ingredients:
- Glycolic Acid (70% solution): 1.5 ml (approx. 30 drops)
- Distilled Water: 20 ml
- Green Tea Extract (liquid): 2 ml
- Chamomile Extract (liquid): 2 ml
- Panthenol (Pro-Vitamin B5): 1 ml
- Sodium PCA (humectant): 1 ml
- Preservative (e.g., Optiphen Plus or Cosgard): according to manufacturer's instructions
- pH test strips: essential for safety
Preparation:
- Sterilization: Ensure all equipment and containers are absolutely sterile.
- Combine Water & Humectants: In a clean beaker, mix the distilled water, panthenol, and sodium PCA. Stir until fully combined.
- Add Extracts: Incorporate the green tea extract and chamomile extract into the mixture. Stir well.
- Introduce Glycolic Acid: Carefully add the glycolic acid solution to the blend. Stir slowly to ensure uniform mixing.
- Adjust pH (Crucial Step): This step is paramount for safety. Test the pH using test strips. For an advanced peel, aim for a pH range of 2.5-3.0. If the pH is too low, use a very dilute solution of baking soda (one pinch in a cup of water) and add drop by drop, re-testing after each drop, until the desired pH is achieved. If the pH is too high, add a tiny amount more of glycolic acid. DO NOT skip or rush this step.
- Add Preservative: Once the pH is stable and safe, add your chosen cosmetic preservative. Mix thoroughly.
- Transfer: Carefully transfer the finished peel into a dark glass dropper bottle.
Application and Storage:
This peel should be used with caution, only once a week or every 10 days, in the evening. Not recommended for very sensitive skin. After cleansing, apply a thin, even layer to dry skin, avoiding eyes, nostrils, and lips. Leave on for no more than 5-10 minutes. Expect a moderate to strong tingling sensation; if irritation becomes severe, rinse immediately. Rinse thoroughly with cool water. Immediately follow with a barrier-repairing cream or oil to soothe and protect the skin. Store in a cool, dark place (refrigeration is essential) for up to 3 weeks. Due to the lower pH and higher activity, its shelf life is shorter. Discard if any signs of spoilage appear.
General Recommendations for Using and Storing Homemade Peels
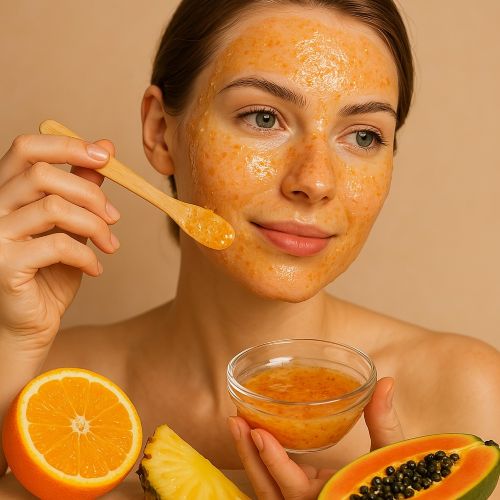
- Patch Test is Mandatory: ALWAYS perform a patch test on a small, inconspicuous area of skin (e.g., behind the ear or inner arm) 24-48 hours before applying the peel to your entire face. This helps identify potential allergic reactions or excessive sensitivity.
- Gradual Introduction: If you are new to AHA peels, start with the lowest concentration and shortest application time. Gradually increase strength and duration as your skin builds tolerance.
- Sun Protection: AHA peels increase your skin's sensitivity to UV radiation. It is absolutely crucial to apply a broad-spectrum sunscreen with an SPF of 30 or higher every morning, even on cloudy days, while using and for at least a week after using AHA peels. Failure to do so can lead to sunburn and hyperpigmentation.
- Avoid Active Breakouts/Irritation: Do not use AHA peels on broken, irritated, or inflamed skin, or on active acne lesions. This can worsen irritation and potentially lead to scarring.
- Storage: Store homemade peels in dark, airtight containers in a cool, dark place, ideally the refrigerator. This minimizes oxidation and bacterial growth.
- Shelf Life: Due to the lack of strong industrial preservatives, homemade peels have a limited shelf life (typically 1-3 months, depending on the recipe and storage conditions). Always check for changes in color, smell, or texture, and discard if suspicious.
- pH is Key: The pH level of an AHA peel is critical for both effectiveness and safety. Too high, and it won't exfoliate; too low, and it can cause severe irritation or burns. Always use reliable pH test strips and adjust accordingly.
- Listen to Your Skin: Pay close attention to how your skin reacts. Mild tingling is normal, but strong burning, prolonged redness, or excessive discomfort indicates the peel is too strong or has been left on too long. Rinse immediately if this occurs.
- Post-Peel Care: After rinsing off the peel, apply soothing and hydrating ingredients like hyaluronic acid serum, ceramide-rich moisturizer, or a calming facial oil to help restore the skin's barrier.
Embracing homemade skincare, especially with powerful ingredients like AHA acids, empowers you to take control of your skin's health. By carefully following these recipes and safety guidelines, you can unlock the secret to renewed, radiant, and beautifully smooth skin from the comfort of your home.


Cosmetic ingredients and professional formulation blog
This section features expert materials on modern cosmetic actives. We cover peptides, polynucleotides PDRN, different forms of hyaluronic acid, retinoids, ceramides and other key components.
Special focus is given to active stability, ingredient compatibility and correct incorporation into formulas. You will find practical guides on working with anti-age actives, moisturizing complexes and barrier repair ingredients.
We examine how to properly combine myorelaxants with peptides, common mistakes when using unstable vitamin C forms and ways to improve the performance of moisturizing actives.
Separate materials are dedicated to base oils, extracts, emulsifiers and supporting ingredients. This helps create stable and effective formulas for both professional and home cosmetics.
The blog regularly publishes reviews of trending actives, comparisons of similar ingredients and step-by-step formulation recommendations. The content is aimed at formulators, technologists and anyone seriously involved in creating cosmetic products.
Why this blog is useful
Here you will find practical data on eye area care actives, lifting systems and ingredients that improve skin firmness and tone. We rely on real formulation experience and address the actual challenges that arise during product development.
You can also explore materials on skin protection and repair, depigmentation and anti-inflammatory actives. This approach supports a more systematic selection of ingredients.
FAQ
What topics are covered most often
The blog focuses on peptides, PDRN, hyaluronic acid of different molecular weights, retinoids, ceramides and their compatibility rules.
Are there practical recommendations on how to incorporate actives
Yes, most articles include practical notes on pH stability, incorporation temperature and common formulation mistakes.
Is the content only for professionals
The materials are useful both for formulators and technologists and for those who create cosmetics for personal use and want to understand how modern ingredients work.
Where can I go directly to the ingredients
All key actives are collected in the Actives section, while base components are available in base oils and related categories.