-
 DIY: Video master classes
-
 Aromatherapy
-
 Felting master classes
-
 Eating at home
-
 DIY cosmetics for children
-
 Cooking recipes
-
 Detergents, cleaning products with your own hands
-
 Soap making as a business
-
 Natural cosmetics. Raw materials for cosmetics and soap.
-
 Natural oils in cosmetics
-
 News
-
 Recipes for balms and conditioners
-
 Bath Bomb Recipes
-
 Cream recipes. Cream making.
-
 Lotion recipes. Gel recipes.
-
 Mask recipes
-
 Soap recipes. Base soap. Soap from scratch.
-
 Recipes for all occasions
-
 Natural shampoo recipes
-
 Healthy Nutrition Recipes
-
 Scrub recipes. Massage tiles. Ubtan
-
 DIY candles
-
 Reference materials, questions, tips
-
 Startup - soap production
-
 Hair care. Tips, recipes
-
 Facial skin care. Cleansers.
-
 Body care. Tips, recipes
-
 Photo Reviews
-
 Chocolate Handmade


Mistakes when preparing an emulsion: how not to ruin your cream and lotion
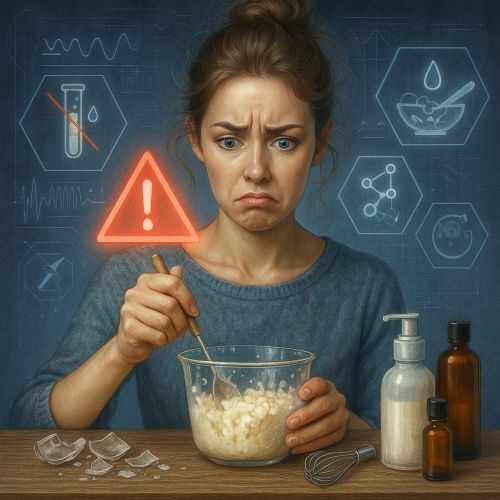
Introduction: The Art and Science of Cosmetic Emulsions
Creating your own skincare products, such as luxurious creams and silky lotions, can be a rewarding experience. You gain control over the ingredients, tailoring them to your specific skin needs and preferences. However, the heart of many of these formulations lies in the creation of a stable emulsion – a seemingly simple yet often tricky process of combining oil and water-based ingredients. Without proper technique and understanding, your beautiful concoction can quickly turn into a separated, unusable mess. This article delves into the common errors encountered during emulsion preparation, providing detailed insights and solutions to ensure your homemade cosmetics achieve the desired texture, stability, and efficacy.
Understanding Emulsions: The Foundation of Creams and Lotions
Before diving into the pitfalls, it's crucial to grasp the fundamental concept of an emulsion. An emulsion is a mixture of two or more liquids that are normally immiscible (unmixable or unblendable). In cosmetics, this typically involves oil-based ingredients (esters, butters, waxes) and water-based ingredients (hydrosols, aloe vera juice, water). To bring these phases together and keep them from separating, an emulsifier is essential. Emulsifiers work by reducing the surface tension between the oil and water phases, allowing them to disperse and form a stable, homogenous mixture.
Common Errors in Emulsion Preparation and How to Avoid Them
Many factors can contribute to an unstable or unsatisfactory emulsion. Understanding these potential pitfalls is the first step towards achieving cosmetic perfection.
- Insufficient or Incorrect Emulsifier: This is arguably the most frequent culprit of emulsion failure. Using too little emulsifier or selecting an emulsifier that isn't suitable for the specific oil and water phase ratio can lead to separation. Research your emulsifier's HLB (Hydrophilic-Lipophilic Balance) value and the HLB requirement of your oil phase to ensure compatibility and adequate usage levels.
- Incompatible Ingredients: Certain ingredients can interfere with the emulsification process. High concentrations of salts, gums not compatible with the emulsifier, or adding ingredients at the wrong temperature can destabilize the emulsion. Always research the compatibility of your chosen ingredients.
- Incorrect Temperature Control: The oil and water phases often need to be heated separately to similar temperatures (usually between 60-75°C or 140-167°F) before combining. Introducing phases at significantly different temperatures can shock the emulsifier and prevent proper binding. Use a reliable thermometer to monitor temperatures accurately.
- Improper Mixing: The method and duration of mixing are critical. Insufficient mixing won't provide enough energy for the emulsifier to do its job, while overly vigorous or prolonged mixing, especially after the emulsion has formed, can sometimes break it. Use a suitable mixing device (handheld immersion blender, mini mixer) and follow recommended mixing times for your recipe.
- Adding Ingredients Too Quickly: Gradually incorporating one phase into the other, typically the oil into the water phase while mixing continuously, allows the emulsifier to properly integrate the liquids. Pouring everything together at once overwhelms the emulsifier and increases the risk of separation.
- Contamination: Introducing bacteria or fungi during the preparation process can not only spoil your emulsion but also pose a risk to your skin. Always work in a clean environment, sanitize your equipment thoroughly with isopropyl alcohol, and use preservatives in water-containing formulations.
- Incorrect pH: The pH of your final product can affect the stability of the emulsion and the efficacy of certain ingredients. Adjusting the pH to the optimal range for your skin and the formulation is often necessary after the emulsion has cooled.
Recipe 1: Troubleshooting a Separating Lotion
This recipe focuses on rescuing a lotion that shows signs of separation after cooling.
Ingredients:
- Separated Lotion: Your previously made lotion that has begun to separate.
- Emulsifying Wax (e.g., Polawax, BTMS): 1-2% of the total lotion weight (choose the same emulsifier used initially if possible).
- Distilled Water: A small amount (approximately 5-10% of the emulsifying wax weight).
Preparation:
- Sanitize all equipment (beakers, stirring rod, immersion blender) with isopropyl alcohol.
- Gently reheat the separated lotion in a heat-resistant beaker in a water bath. Heat slowly and stir gently to avoid further disruption.
- In a separate small beaker, combine the emulsifying wax and distilled water. Heat this mixture in the water bath until the wax is completely melted and the mixture is clear.
- Once both mixtures are warm (around 50-60°C or 122-140°F), slowly pour the melted emulsifying wax mixture into the separated lotion while continuously mixing with an immersion blender at a medium speed.
- Continue mixing for several minutes until the lotion appears homogenous and stable again.
- Remove from the heat bath and continue stirring gently as the lotion cools to room temperature.
- If necessary, you can add a small amount of a compatible preservative if the original formulation lacked sufficient preservation.
Tips for Prevention:
- Ensure you used an adequate amount of a suitable emulsifier in the original recipe.
- Maintain consistent temperatures when combining the oil and water phases.
- Mix thoroughly for the recommended duration during the emulsification process.
Recipe 2: Preventing a Lumpy Cream
This recipe addresses the issue of a cream developing a lumpy or grainy texture.
Ingredients:
- Distilled Water or Hydrosol: 60% of the total cream weight.
- Oil Phase (e.g., Jojoba Oil, Shea Butter, Cetyl Alcohol): 30% of the total cream weight.
- Emulsifying Wax (e.g., Polawax, Glyceryl Stearate & PEG-100 Stearate): 5-8% of the total cream weight (adjust based on the emulsifier and desired thickness).
- Glycerin: 3% of the total cream weight.
- Preservative: As per manufacturer's instructions.
Preparation:
- Sanitize all equipment.
- In one heat-resistant beaker, combine the distilled water/hydrosol and glycerin. Heat in a water bath to 70-75°C (158-167°F).
- In a separate heat-resistant beaker, combine the oil phase ingredients and the emulsifying wax. Heat in the water bath to the same temperature (70-75°C or 158-167°F) until all waxes and butters are completely melted.
- Once both phases are at the correct temperature, slowly pour the oil phase into the water phase while continuously mixing vigorously with an immersion blender. Mix for 2-3 minutes until a smooth emulsion forms.
- Remove from the heat bath and continue mixing gently as the cream cools. Using a spatula to scrape down the sides of the beaker can help prevent lumps.
- Once the cream has cooled to around 40°C (104°F), add any heat-sensitive ingredients (e.g., essential oils, certain extracts) and mix gently.
- Add the preservative according to the manufacturer's instructions and mix thoroughly.
- Transfer the cream to a clean, sanitized jar.
Tips for Prevention:
- Ensure the emulsifying wax is fully melted in the oil phase.
- Maintain consistent temperatures during mixing.
- Mix thoroughly and for an adequate duration during the emulsification process.
- Avoid adding solid particles or poorly soluble ingredients that can contribute to a grainy texture.
Recipe 3: Achieving a Stable, Lightweight Lotion
This recipe focuses on creating a light and stable lotion that absorbs easily without feeling greasy.
Ingredients:
- Hydrosol (e.g., Rose Hydrosol, Witch Hazel Hydrosol): 70% of the total lotion weight.
- Lightweight Oil (e.g., Grapeseed Oil, Squalane): 20% of the total lotion weight.
- Emulsifier (e.g., Glyceryl Stearate SE): 3-5% of the total lotion weight (this self-emulsifying wax simplifies the process).
- Vegetable Glycerin: 2% of the total lotion weight.
- Xanthan Gum (for added stability and texture): 0.1-0.3% of the total lotion weight (disperse in glycerin before adding to the water phase).
- Preservative: As per manufacturer's instructions.
Preparation:
- Sanitize all equipment.
- In one beaker, whisk the xanthan gum into the glycerin until fully dispersed and there are no clumps. Then, add the hydrosol and stir until the xanthan gum is fully hydrated and the mixture is slightly thickened. Heat this water phase in a water bath to 65-70°C (149-158°F).
- In a separate beaker, combine the lightweight oil and the Glyceryl Stearate SE. Heat in the water bath to the same temperature (65-70°C or 149-158°F) until the emulsifier is completely melted.
- Slowly pour the oil phase into the water phase while continuously mixing with an immersion blender or a high-speed mixer. Mix for 2-3 minutes until a smooth, homogenous emulsion forms.
- Remove from the heat bath and continue stirring gently as the lotion cools.
- Once the lotion has cooled to around 40°C (104°F), add any heat-sensitive ingredients.
- Add the preservative according to the manufacturer's instructions and mix thoroughly.
- Transfer the lotion to a clean, sanitized bottle or jar.
Tips for Prevention:
- Properly disperse any gums before adding them to the water phase to prevent clumping.
- Use a suitable emulsifier for the desired texture and oil load. Glyceryl Stearate SE is excellent for lighter lotions.
- Maintain consistent temperatures during emulsification.
Advantages of Successfully Prepared Homemade Emulsions
- Control Over Ingredients: You have complete control over what goes into your skincare, avoiding potential irritants, allergens, and unnecessary additives found in some industrial products.
- Freshness and Potency: You can prepare smaller batches more frequently, ensuring the active ingredients are fresh and potent.
- Customization: Tailor recipes to your specific skin type and concerns, adjusting oil ratios, adding specific extracts, and controlling fragrance levels.
- Cost-Effective: Often, the cost of ingredients for homemade emulsions is significantly lower than comparable high-quality industrial products.
- Educational and Rewarding: The process of creating your own skincare can be a fulfilling and educational experience, deepening your understanding of cosmetic formulation.
Conclusion: Mastering the Art of Emulsion for Beautiful Skin
While the preparation of cosmetic emulsions can sometimes be challenging, understanding the common pitfalls and implementing proper techniques will significantly increase your success rate. By paying attention to ingredient compatibility, temperature control, mixing methods, and hygiene, you can create beautiful, stable, and effective homemade creams and lotions that cater perfectly to your skin's needs. Embrace the learning process, experiment with different recipes, and enjoy the rewarding experience of crafting your own skincare masterpieces.


Cosmetic ingredients and professional formulation blog
This section features expert materials on modern cosmetic actives. We cover peptides, polynucleotides PDRN, different forms of hyaluronic acid, retinoids, ceramides and other key components.
Special focus is given to active stability, ingredient compatibility and correct incorporation into formulas. You will find practical guides on working with anti-age actives, moisturizing complexes and barrier repair ingredients.
We examine how to properly combine myorelaxants with peptides, common mistakes when using unstable vitamin C forms and ways to improve the performance of moisturizing actives.
Separate materials are dedicated to base oils, extracts, emulsifiers and supporting ingredients. This helps create stable and effective formulas for both professional and home cosmetics.
The blog regularly publishes reviews of trending actives, comparisons of similar ingredients and step-by-step formulation recommendations. The content is aimed at formulators, technologists and anyone seriously involved in creating cosmetic products.
Why this blog is useful
Here you will find practical data on eye area care actives, lifting systems and ingredients that improve skin firmness and tone. We rely on real formulation experience and address the actual challenges that arise during product development.
You can also explore materials on skin protection and repair, depigmentation and anti-inflammatory actives. This approach supports a more systematic selection of ingredients.
FAQ
What topics are covered most often
The blog focuses on peptides, PDRN, hyaluronic acid of different molecular weights, retinoids, ceramides and their compatibility rules.
Are there practical recommendations on how to incorporate actives
Yes, most articles include practical notes on pH stability, incorporation temperature and common formulation mistakes.
Is the content only for professionals
The materials are useful both for formulators and technologists and for those who create cosmetics for personal use and want to understand how modern ingredients work.
Where can I go directly to the ingredients
All key actives are collected in the Actives section, while base components are available in base oils and related categories.