-
 DIY: Video master classes
-
 Aromatherapy
-
 Felting master classes
-
 Eating at home
-
 DIY cosmetics for children
-
 Cooking recipes
-
 Detergents, cleaning products with your own hands
-
 Soap making as a business
-
 Natural cosmetics. Raw materials for cosmetics and soap.
-
 Natural oils in cosmetics
-
 News
-
 Recipes for balms and conditioners
-
 Bath Bomb Recipes
-
 Cream recipes. Cream making.
-
 Lotion recipes. Gel recipes.
-
 Mask recipes
-
 Soap recipes. Base soap. Soap from scratch.
-
 Recipes for all occasions
-
 Natural shampoo recipes
-
 Healthy Nutrition Recipes
-
 Scrub recipes. Massage tiles. Ubtan
-
 DIY candles
-
 Reference materials, questions, tips
-
 Startup - soap production
-
 Hair care. Tips, recipes
-
 Facial skin care. Cleansers.
-
 Body care. Tips, recipes
-
 Photo Reviews
-
 Chocolate Handmade


Concentrated moisturizing cream
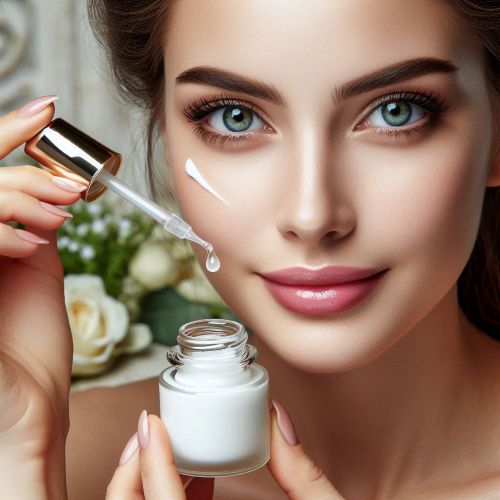 In a world saturated with mass-produced skincare, the allure of crafting your own concentrated moisturizing cream stands out. Not only does it offer a personalized approach to skincare, but it also empowers you to control the ingredients, ensuring purity and potency. This article delves into the art of creating a truly concentrated moisturizing cream, exploring its benefits, and providing three detailed recipes to guide you on your journey to radiant, deeply hydrated skin.
Why Choose Homemade Concentrated Moisturizing Cream?
Industrial moisturizing creams often rely on fillers, preservatives, and synthetic fragrances that can irritate sensitive skin and diminish the efficacy of active ingredients. By crafting your own cream, you gain several distinct advantages:
- Ingredient Control: You select every ingredient, ensuring they align with your skin's specific needs and avoiding potential allergens.
- Potency and Freshness: Homemade creams are made in small batches, guaranteeing the freshness and potency of active ingredients.
- Customization: You can tailor the cream's texture, fragrance, and active ingredients to suit your preferences and address specific skin concerns.
- Cost-Effectiveness: Over time, creating your own skincare products can be more economical than purchasing high-end commercial creams.
- Reduced Preservatives: You can minimize the need for harsh preservatives by making smaller batches and storing them properly.
Understanding the Key Ingredients
A concentrated moisturizing cream typically comprises three essential components:
- Humectants: These ingredients attract and retain moisture from the environment, drawing it into the skin. Examples include hyaluronic acid, glycerin, and aloe vera.
- Emollients: These ingredients soften and smooth the skin by filling in the gaps between skin cells. Examples include shea butter, cocoa butter, and plant-based oils.
- Occlusives: These ingredients form a protective barrier on the skin's surface, preventing moisture loss. Examples include beeswax, lanolin, and plant-based waxes.
Recipe 1: Hyaluronic Acid & Shea Butter Deep Hydration Cream
This recipe is ideal for dry, dehydrated skin, combining the powerful humectant properties of hyaluronic acid with the rich emollient benefits of shea butter.
Ingredients:
- 2 tablespoons Shea Butter
- 1 tablespoon Jojoba Oil
- 1 teaspoon Emulsifying Wax
- 1/2 cup Distilled Water
- 1 teaspoon Hyaluronic Acid Powder
- 1/2 teaspoon Preservative (e.g., Leucidal Liquid SF)
- Optional: 5 drops of Lavender essential oil.
Instructions:
- Melt the Oils and Wax: In a double boiler or heat-safe bowl, melt the shea butter, jojoba oil, and emulsifying wax until completely liquid.
- Heat the Water: In a separate heat-safe container, heat the distilled water to the same temperature as the oil mixture.
- Combine the Phases: Slowly pour the heated water into the oil mixture, whisking continuously to emulsify.
- Cool and Add Actives: Remove the mixture from heat and allow it to cool to room temperature. Once cooled, add the hyaluronic acid powder and whisk until fully dissolved.
- Add Preservative and Essential Oil: Incorporate the preservative and any essential oils you desire.
- Whip and Package: Use a hand mixer or immersion blender to whip the cream until it reaches a light, fluffy consistency. Transfer the cream to a clean, airtight container.
Recipe 2: Aloe Vera & Cocoa Butter Intensive Moisture Cream
This recipe is perfect for soothing irritated skin and providing intense moisture, leveraging the calming properties of aloe vera and the rich emollient benefits of cocoa butter.
Ingredients:
- 2 tablespoons Cocoa Butter
- 1 tablespoon Almond Oil
- 1 teaspoon Beeswax
- 1/2 cup Aloe Vera Gel
- 1/2 teaspoon Vegetable Glycerin
- 1/2 teaspoon Preservative (e.g., Germall Plus)
- Optional: 5 drops of Chamomile essential oil.
Instructions:
- Melt the Oils and Wax: In a double boiler or heat-safe bowl, melt the cocoa butter, almond oil, and beeswax until completely liquid.
- Combine Aloe and Glycerin: In a separate container, combine the aloe vera gel and vegetable glycerin.
- Combine the Phases: Slowly pour the aloe vera mixture into the oil mixture, whisking continuously to emulsify.
- Cool and Add Preservative: Remove the mixture from heat and allow it to cool to room temperature. Once cooled, add the preservative and any essential oils you desire.
- Whip and Package: Use a hand mixer or immersion blender to whip the cream until it reaches a smooth, creamy consistency. Transfer the cream to a clean, airtight container.
Recipe 3: Plant Wax & Squalane Barrier Repair Cream
This recipe is designed to repair and strengthen the skin's barrier, using plant-based wax and squalane for optimal protection and hydration.
Ingredients:
- 2 tablespoons Plant Based Wax (Candelilla or similar)
- 1 tablespoon Squalane Oil
- 1 tablespoon Camellia Oil
- 1/2 cup Distilled Water
- 1/2 teaspoon Panthenol (Vitamin B5)
- 1/2 teaspoon Preservative (e.g., Optiphen Plus)
Instructions:
- Melt the Oils and Wax: In a double boiler or heat-safe bowl, melt the plant wax, squalane oil, and camellia oil until completely liquid.
- Heat the Water: In a separate heat-safe container, heat the distilled water to the same temperature as the oil mixture.
- Combine the Phases: Slowly pour the heated water into the oil mixture, whisking continuously to emulsify.
- Cool and Add Actives: Remove the mixture from heat and allow it to cool to room temperature. Once cooled, add the Panthenol and whisk until fully dissolved.
- Add Preservative: Incorporate the preservative.
- Whip and Package: Use a hand mixer or immersion blender to whip the cream until it reaches a smooth, creamy consistency. Transfer the cream to a clean, airtight container.
Recommendations for Use:
- Apply the cream to clean, damp skin for optimal absorption.
- Use a small amount of cream, as these recipes are highly concentrated.
- For best results, apply the cream twice daily, morning and night.
- Perform a patch test before using any new skincare product.
Storage and Shelf Life:
- Store your homemade moisturizing cream in a cool, dark place.
- Use clean, sanitized containers and tools to prevent contamination.
- Homemade creams typically have a shelf life of 1-3 months, depending on the ingredients and preservatives used.
- Observe the cream for any changes in color, texture, or scent, which may indicate spoilage.
By embracing the art of crafting your own concentrated moisturizing cream, you unlock a world of personalized skincare, harnessing the power of natural ingredients to achieve deep hydration and radiant skin.


Cosmetic ingredients and professional formulation blog
This section features expert materials on modern cosmetic actives. We cover peptides, polynucleotides PDRN, different forms of hyaluronic acid, retinoids, ceramides and other key components.
Special focus is given to active stability, ingredient compatibility and correct incorporation into formulas. You will find practical guides on working with anti-age actives, moisturizing complexes and barrier repair ingredients.
We examine how to properly combine myorelaxants with peptides, common mistakes when using unstable vitamin C forms and ways to improve the performance of moisturizing actives.
Separate materials are dedicated to base oils, extracts, emulsifiers and supporting ingredients. This helps create stable and effective formulas for both professional and home cosmetics.
The blog regularly publishes reviews of trending actives, comparisons of similar ingredients and step-by-step formulation recommendations. The content is aimed at formulators, technologists and anyone seriously involved in creating cosmetic products.
Why this blog is useful
Here you will find practical data on eye area care actives, lifting systems and ingredients that improve skin firmness and tone. We rely on real formulation experience and address the actual challenges that arise during product development.
You can also explore materials on skin protection and repair, depigmentation and anti-inflammatory actives. This approach supports a more systematic selection of ingredients.
FAQ
What topics are covered most often
The blog focuses on peptides, PDRN, hyaluronic acid of different molecular weights, retinoids, ceramides and their compatibility rules.
Are there practical recommendations on how to incorporate actives
Yes, most articles include practical notes on pH stability, incorporation temperature and common formulation mistakes.
Is the content only for professionals
The materials are useful both for formulators and technologists and for those who create cosmetics for personal use and want to understand how modern ingredients work.
Where can I go directly to the ingredients
All key actives are collected in the Actives section, while base components are available in base oils and related categories.



