-
 DIY: Video master classes
-
 Aromatherapy
-
 Felting master classes
-
 Eating at home
-
 DIY cosmetics for children
-
 Cooking recipes
-
 Detergents, cleaning products with your own hands
-
 Soap making as a business
-
 Natural cosmetics. Raw materials for cosmetics and soap.
-
 Natural oils in cosmetics
-
 News
-
 Recipes for balms and conditioners
-
 Bath Bomb Recipes
-
 Cream recipes. Cream making.
-
 Lotion recipes. Gel recipes.
-
 Mask recipes
-
 Soap recipes. Base soap. Soap from scratch.
-
 Recipes for all occasions
-
 Natural shampoo recipes
-
 Healthy Nutrition Recipes
-
 Scrub recipes. Massage tiles. Ubtan
-
 DIY candles
-
 Reference materials, questions, tips
-
 Startup - soap production
-
 Hair care. Tips, recipes
-
 Facial skin care. Cleansers.
-
 Body care. Tips, recipes
-
 Photo Reviews
-
 Chocolate Handmade


How to Make a Soy Candle with Your Own Hands - Comfort, Aroma, and Eco-Friendliness
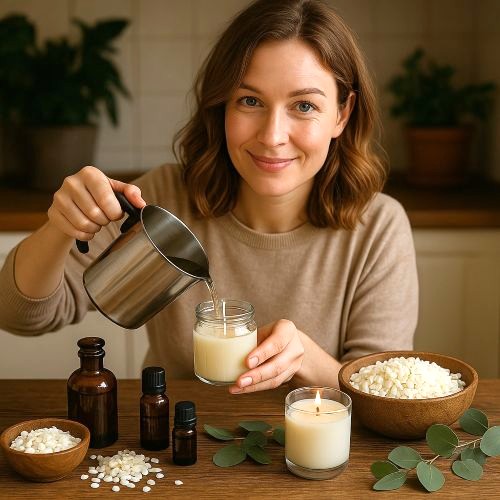 Soy candles offer a delightful blend of ambiance, aroma, and eco-consciousness, making them a popular choice for enhancing any living space. Crafting them yourself is a rewarding process that allows for complete control over ingredients and scent, setting them apart from many commercially produced alternatives. This guide will walk you through the art of making your own soy candles, exploring their benefits, and providing detailed recipes for various aromatic experiences.
Why Choose Soy Candles?
Soy candles are made from soybean oil, a natural, renewable resource. This makes them a more environmentally friendly option compared to traditional paraffin wax candles, which are derived from petroleum. Beyond their eco-credentials, soy candles offer several compelling advantages:
- Clean Burn: Soy wax burns cleaner than paraffin, producing significantly less soot. This means less black residue on your walls and ceilings, and a healthier indoor air environment.
- Longer Lasting: Soy wax has a lower melting point, causing it to burn slower and last longer than paraffin candles of the same size. This provides more hours of fragrant enjoyment.
- Excellent Scent Throw: Soy wax holds fragrance oils and essential oils effectively, releasing their aroma consistently and pleasantly as the candle burns.
- Biodegradable and Easy Cleanup: Spills are easy to clean up with just soap and warm water, as soy wax is biodegradable.
- Renewable Resource: Soybeans are a sustainable crop, making soy wax a more environmentally responsible choice.
Advantages of Homemade Soy Candles Over Industrial Alternatives
Creating your own soy candles at home offers a significant edge over purchasing mass-produced ones:
- Ingredient Control: You choose every component. This means no hidden synthetic fragrances, phthalates, dyes, or petroleum-based additives that are common in commercial candles. You can opt for 100% natural essential oils for scent and ensure your wax is pure soy.
- Customizable Scents: Unleash your creativity! Blend unique essential oil combinations to craft a scent that perfectly matches your mood, preferences, or the season. Commercial candles often offer limited or generic scent profiles.
- Cost-Effective: While there's an initial investment in supplies, making candles in batches is often significantly cheaper in the long run than repeatedly buying high-quality commercial soy candles.
- Personalized Aesthetics: Select your preferred wicks, containers, and even add natural decorative elements like dried flowers or coffee beans (ensure they are safely placed away from the wick).
- Therapeutic Experience: The process of making candles can be a calming and meditative activity. The final product also contributes to a more mindful and relaxing home environment.
- Reduced Environmental Impact: By making your own, you reduce packaging waste and support sustainable practices by sourcing ingredients responsibly.
Essential Supplies for Candle Making
Before diving into the recipes, gather these basic supplies:
- Soy Wax Flakes: Look for 100% natural soy wax.
- Wicks: Choose cotton or wood wicks appropriate for the diameter of your container. A general rule: wider wicks for wider containers.
- Wick Clips/Stickers: To secure the wick to the bottom of the container.
- Wick Centering Tools: To keep the wick upright and centered while the wax sets.
- Heat-Resistant Containers: Jars, tins, or ceramic vessels. Ensure they can withstand heat.
- Heat-Resistant Pouring Pitcher: With a spout for easy pouring.
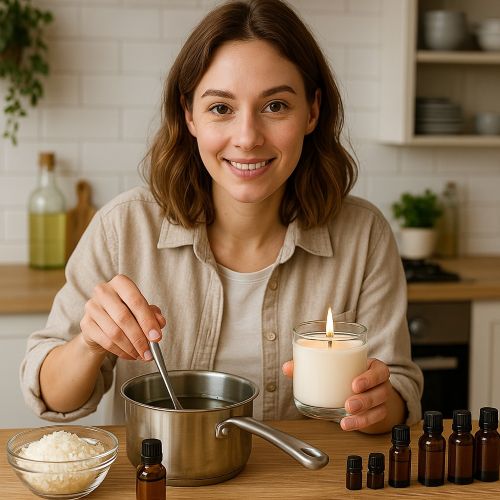
- Double Boiler Setup: A larger pot with water and a smaller pitcher for melting wax, preventing direct heat exposure.
- Thermometer: Essential for monitoring wax temperature when adding fragrance oils.
- Scale: For accurately measuring wax and fragrance.
- Fragrance Oils or Essential Oils: High-quality, candle-grade options.
- Stirring Utensil: A heat-resistant spoon or stick.
Detailed Recipes for Homemade Soy Candles
General Candle-Making Process (Applies to all recipes):
- Preparation: Clean and dry your chosen candle containers. Attach a wick clip/sticker to the bottom of each wick and firmly press it onto the center of the container's base. Use a wick centering tool to keep the wick upright.
- Melt Wax: Measure the desired amount of soy wax flakes using a scale (approx. 1 lb of wax fills two 8 oz jars). Place the wax in your pouring pitcher. Create a double boiler by placing the pitcher inside a larger pot filled with a few inches of water. Heat the water over medium heat.
- Monitor Temperature: As the wax melts, monitor its temperature with a thermometer. Stir occasionally to help it melt evenly.
- Add Fragrance: Once the wax is fully melted and reaches the recommended temperature for fragrance addition (usually around 185°F / 85°C, but check your wax manufacturer's guidelines), remove it from heat. Add your fragrance oil or essential oil blend (see specific ratios in recipes below). Stir gently but thoroughly for at least 2 minutes to ensure the fragrance is fully incorporated.
- Pour Wax: Let the wax cool slightly to its pouring temperature (usually around 135-150°F / 57-65°C, again, check manufacturer's guidelines). This helps prevent frosting and ensures a smooth top. Slowly and carefully pour the melted wax into your prepared containers, leaving about ½ inch of space from the top.
- Cure Time: Allow the candles to cool and cure completely at room temperature, undisturbed, for at least 24-48 hours. For optimal scent throw, a full cure time of 1-2 weeks is often recommended. This allows the fragrance molecules to fully bind with the wax.
- Trim Wick: Once fully cured, trim the wick to about ¼ inch (0.6 cm) before the first burn.
Recipe #1: Classic Lavender & Vanilla Dream Candle
This calming and comforting blend is perfect for creating a serene atmosphere, ideal for bedrooms or winding down after a long day.
- Wax: 1 lb (approx. 450g) 100% natural soy wax flakes
- Fragrance:
- Lavender Essential Oil: 0.5 oz (approx. 15ml, or 100-150 drops depending on desired strength)
- Vanilla Oleoresin (or vanilla fragrance oil): 0.25 oz (approx. 7.5ml, or 50-75 drops)
- Containers: Two 8 oz (approx. 240ml) candle jars
Nuances: Vanilla oleoresin can be thick; gently warm it before adding to the wax for easier blending. Ensure both oils are well-stirred into the melted wax.
Recipe #2: Invigorating Citrus & Ginger Zest Candle
A bright and uplifting scent that's perfect for kitchens, living rooms, or anytime you need a refreshing boost.
- Wax: 1 lb (approx. 450g) 100% natural soy wax flakes
- Fragrance:
- Lemon Essential Oil: 0.3 oz (approx. 9ml)
- Sweet Orange Essential Oil: 0.3 oz (approx. 9ml)
- Ginger Essential Oil: 0.1 oz (approx. 3ml)
- Containers: Two 8 oz (approx. 240ml) candle jars
Nuances: Citrus essential oils are top notes and can evaporate faster. Ensure proper mixing and curing to maximize scent throw. Consider a slightly higher fragrance load if you prefer a stronger citrus aroma.
Recipe #3: Cozy Sandalwood & Amber Comfort Candle
A sophisticated, warm, and grounding scent that adds an inviting ambiance to any space, especially cozy reading nooks or entertaining areas.
- Wax: 1 lb (approx. 450g) 100% natural soy wax flakes
- Fragrance:
- Sandalwood Essential Oil (or fragrance oil): 0.4 oz (approx. 12ml)
- Amber Fragrance Oil (or a blend of Benzoin and Patchouli essential oils): 0.3 oz (approx. 9ml)
- Cedarwood Essential Oil: 0.1 oz (approx. 3ml)
- Containers: Two 8 oz (approx. 240ml) candle jars
Nuances: Sandalwood and amber are base notes, which lend longevity to the fragrance. Ensure the wax is thoroughly mixed to evenly distribute these richer scents. For a truly natural version, sourcing high-quality, sustainable sandalwood essential oil is important.
Recommendations for Use and Storage
Using Your Soy Candles:
- First Burn: On the first burn, allow the candle to burn long enough for the entire surface of the wax to melt evenly to the edges of the container. This prevents "tunneling" (where only the center burns down) and ensures a full melt pool on subsequent burns. This can take 2-4 hours.
- Trim Wick: Always trim your wick to ¼ inch (0.6 cm) before each burn. A long wick creates a larger flame, more soot, and a faster burn.
- Burn Time: Do not burn candles for more than 4 hours at a time. Allow the candle to cool completely before relighting.
- Safety First: Never leave a burning candle unattended. Keep away from drafts, flammable materials, children, and pets. Place candles on a heat-resistant surface.
Storing Your Soy Candles:
- Cool, Dark Place: Store finished soy candles in a cool, dark place away from direct sunlight and extreme temperature fluctuations. This prevents discoloration, melting, and helps preserve the fragrance.
- Airtight Lids: If your containers come with lids, use them! This helps protect the candle from dust and keeps the fragrance locked in.
- Optimal Cure: While you can burn candles after 24-48 hours, allowing them to cure for 1-2 weeks will significantly improve the scent throw.
Creating your own soy candles is a rewarding craft that brings warmth, a personalized aroma, and a touch of eco-friendly luxury into your home. With a little practice, you'll be crafting beautiful, long-lasting candles that are truly a reflection of your unique style and values.


Cosmetic ingredients and professional formulation blog
This section features expert materials on modern cosmetic actives. We cover peptides, polynucleotides PDRN, different forms of hyaluronic acid, retinoids, ceramides and other key components.
Special focus is given to active stability, ingredient compatibility and correct incorporation into formulas. You will find practical guides on working with anti-age actives, moisturizing complexes and barrier repair ingredients.
We examine how to properly combine myorelaxants with peptides, common mistakes when using unstable vitamin C forms and ways to improve the performance of moisturizing actives.
Separate materials are dedicated to base oils, extracts, emulsifiers and supporting ingredients. This helps create stable and effective formulas for both professional and home cosmetics.
The blog regularly publishes reviews of trending actives, comparisons of similar ingredients and step-by-step formulation recommendations. The content is aimed at formulators, technologists and anyone seriously involved in creating cosmetic products.
Why this blog is useful
Here you will find practical data on eye area care actives, lifting systems and ingredients that improve skin firmness and tone. We rely on real formulation experience and address the actual challenges that arise during product development.
You can also explore materials on skin protection and repair, depigmentation and anti-inflammatory actives. This approach supports a more systematic selection of ingredients.
FAQ
What topics are covered most often
The blog focuses on peptides, PDRN, hyaluronic acid of different molecular weights, retinoids, ceramides and their compatibility rules.
Are there practical recommendations on how to incorporate actives
Yes, most articles include practical notes on pH stability, incorporation temperature and common formulation mistakes.
Is the content only for professionals
The materials are useful both for formulators and technologists and for those who create cosmetics for personal use and want to understand how modern ingredients work.
Where can I go directly to the ingredients
All key actives are collected in the Actives section, while base components are available in base oils and related categories.



