-
 DIY: Video master classes
-
 Aromatherapy
-
 Felting master classes
-
 Eating at home
-
 DIY cosmetics for children
-
 Cooking recipes
-
 Detergents, cleaning products with your own hands
-
 Soap making as a business
-
 Natural cosmetics. Raw materials for cosmetics and soap.
-
 Natural oils in cosmetics
-
 News
-
 Recipes for balms and conditioners
-
 Bath Bomb Recipes
-
 Cream recipes. Cream making.
-
 Lotion recipes. Gel recipes.
-
 Mask recipes
-
 Soap recipes. Base soap. Soap from scratch.
-
 Recipes for all occasions
-
 Natural shampoo recipes
-
 Healthy Nutrition Recipes
-
 Scrub recipes. Massage tiles. Ubtan
-
 DIY candles
-
 Reference materials, questions, tips
-
 Startup - soap production
-
 Hair care. Tips, recipes
-
 Facial skin care. Cleansers.
-
 Body care. Tips, recipes
-
 Photo Reviews
-
 Chocolate Handmade


How to make oil for split ends of hair - restoration and protection
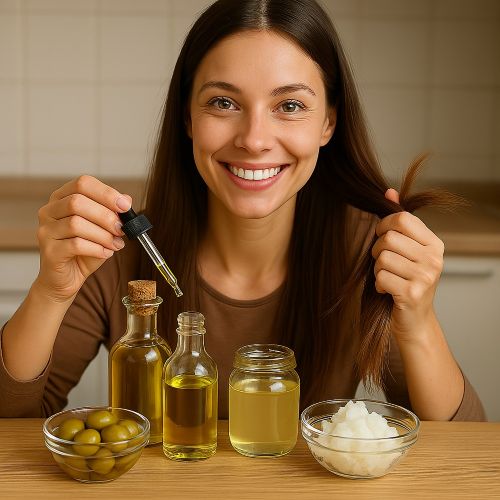 Split ends are a common hair woe, signaling damage, dryness, and a lack of proper care. They make hair look dull, brittle, and unkempt, often forcing us to reach for the scissors. While regular trims are essential, a potent and nourishing oil treatment can significantly reduce the appearance of split ends, prevent further damage, and restore your hair's natural luster and strength. Rather than relying on commercial products often filled with silicones and synthetic ingredients that only mask the problem, creating your own homemade oil offers a pure, effective, and truly beneficial solution.
This comprehensive guide will delve into the world of natural hair oils, explaining why they are so effective against split ends. We'll explore the advantages of crafting your own hair oil over store-bought alternatives, discuss key ingredients and their properties, and provide three detailed recipes tailored to different hair needs. Get ready to transform your hair care routine and embrace truly healthy, beautiful locks.
Understanding Split Ends and Why Oils Help
Split ends, scientifically known as trichoptilosis, occur when the protective outer layer of your hair (the cuticle) becomes damaged and peels back. This exposes the inner cortex, causing the hair shaft to fray and split. Common culprits include: Heat Styling: Frequent use of blow dryers, straighteners, and curling irons. Chemical Treatments: Coloring, perming, and relaxing. Mechanical Stress: Vigorous brushing, tight hairstyles, and rough towel drying. Environmental Factors: Sun exposure, wind, and dry air. Lack of Moisture: Dehydrated hair is more prone to brittleness and breakage.
Natural oils play a crucial role in preventing and treating split ends because they: Penetrate the Hair Shaft: Many natural oils, like coconut oil, can penetrate the hair cortex, reducing protein loss and strengthening the hair from within. Seal the Cuticle: Oils form a protective layer on the hair surface, smoothing down the cuticle and preventing further damage and moisture loss. Provide Essential Nutrients: Rich in vitamins, minerals, and fatty acids, natural oils nourish the hair and scalp, promoting overall hair health. Improve Elasticity: Well-moisturized hair is more flexible and less prone to breakage when stretched or manipulated. Add Shine and Softness: Oils impart a natural luster and silky feel to the hair.
Advantages of Homemade Hair Oil for Split Ends Over Industrial Products
While the market is flooded with products for split ends, crafting your own offers significant benefits: Pure & Natural Ingredients: You control every ingredient, ensuring your oil is free from silicones, parabens, sulfates, artificial fragrances, and other synthetic additives that can build up on hair, weigh it down, or cause irritation. Targeted Customization: Tailor the oil blend to your specific hair type (oily, dry, fine, thick) and concerns (dryness, frizz, breakage, lack of shine). Potency & Freshness: Homemade oils are made in small batches, ensuring the active ingredients are fresh and retain their full potency, unlike mass-produced products with extended shelf lives. Cost-Effectiveness: Purchasing individual natural oils and essential oils is often much more economical in the long run than repeatedly buying expensive commercial serums. Ethical & Sustainable: You can choose organic, cold-pressed, and ethically sourced ingredients, reducing your environmental footprint and supporting responsible production. Multi-Purpose: Many of the base oils used are also beneficial for scalp health, skin moisturization, or other DIY beauty projects.
Key Ingredients for Your Homemade Split End Oil
The choice of carrier oils and essential oils is crucial for an effective split end treatment:
Carrier Oils (Base Oils):
- Coconut Oil: Excellent for penetrating the hair shaft, reducing protein loss. Best for medium to thick hair.
- Argan Oil: Rich in Vitamin E and fatty acids, it's lightweight, highly moisturizing, and adds shine. Great for all hair types, especially fine hair.
- Jojoba Oil: Mimics the scalp's natural sebum, making it highly compatible with hair. It's non-greasy and helps balance oil production.
- Sweet Almond Oil: Lightweight, nourishing, and adds softness and shine.
- Castor Oil: Thick and rich, known for promoting hair growth and strengthening strands. Often used in smaller quantities or blended with lighter oils.
- Olive Oil: Deeply conditioning, rich in antioxidants. Can be heavy, so best for very dry or coarse hair.
Essential Oils (Add for specific benefits and aroma - always dilute!):
- Rosemary Essential Oil: Stimulates circulation, promotes hair growth, and strengthens hair follicles.
- Lavender Essential Oil: Calming, promotes hair growth, and has antimicrobial properties.
- Geranium Essential Oil: Balances oil production, strengthens hair, and adds shine.
- Cedarwood Essential Oil: Stimulates the scalp, helps with dryness, and reduces hair loss.
- Sandalwood Essential Oil: Moisturizing, calming, and adds a beautiful woody aroma.
- Ylang Ylang Essential Oil: Stimulates sebum production, great for dry scalp and hair.
**Important Note on Essential Oils:** Essential oils are highly concentrated. Always perform a patch test before using, and never apply undiluted to skin or hair. A general dilution ratio for hair oils is 1-2% essential oil to carrier oil (about 5-10 drops per 30ml/1 oz of carrier oil).
Preparation Nuances for Homemade Hair Oils
Making hair oil is straightforward, but a few nuances ensure the best results: Cleanliness is Key: Ensure all your tools (measuring spoons, funnels, mixing bowls) and storage bottles are thoroughly cleaned and dry to prevent contamination. Sterilize glass bottles by washing them with hot soapy water, rinsing, and then drying in a low oven for 10-15 minutes or with rubbing alcohol. Accurate Measurement: Use precise measurements for both carrier and essential oils. Too much essential oil can cause irritation. Gentle Mixing: Mix the oils gently to combine them without introducing excessive air, which can accelerate oxidation. Dark Glass Bottles: Store your finished oil in dark amber or cobalt blue glass bottles with droppers. This protects the oils from light degradation, preserving their potency and shelf life. No Heat for Essential Oils: Never heat essential oils directly, as this can degrade their therapeutic properties. Add them only after the carrier oils have been heated (if applicable) and cooled slightly.
Three Detailed Recipes for Split End Oil
Here are three versatile recipes for different hair needs, focusing on split end repair and protection.
Recipe #1: The Classic Repair & Shine Oil (For Most Hair Types)
This balanced blend is excellent for general hair health, shine, and split end prevention.
Ingredients:
- Jojoba Oil: 30 ml (1 fl oz)
- Sweet Almond Oil: 15 ml (0.5 fl oz)
- Argan Oil: 5 ml (0.17 fl oz)
- Lavender Essential Oil: 5 drops
- Rosemary Essential Oil: 3 drops
- Vitamin E Oil: 1/2 teaspoon (optional, acts as an antioxidant)
Preparation:
- Combine Carrier Oils: In a clean, sterilized glass dropper bottle (or small glass beaker for mixing), combine the jojoba oil, sweet almond oil, and argan oil.
- Add Essential Oils: Add the lavender and rosemary essential oils. If using, add the Vitamin E oil.
- Mix Gently: Cap the bottle tightly and gently roll it between your palms or invert it a few times to thoroughly mix all the oils. Avoid vigorous shaking.
- Label: Label your bottle with the date of creation and ingredients.
Recipe #2: Intensive Repair Oil for Dry & Damaged Hair
This richer blend provides deep conditioning and aims to seal heavily damaged ends.
Ingredients:
- Coconut Oil (Fractionated): 20 ml (0.67 fl oz) - *Fractionated coconut oil stays liquid.* If using regular coconut oil, gently warm it to liquid state before mixing.
- Castor Oil: 15 ml (0.5 fl oz)
- Olive Oil (Extra Virgin): 10 ml (0.33 fl oz)
- Geranium Essential Oil: 6 drops
- Sandalwood Essential Oil: 4 drops
- Vitamin E Oil: 1/2 teaspoon
Preparation:
- Combine Carrier Oils: In a clean, sterilized glass dropper bottle, combine fractionated coconut oil, castor oil, and olive oil. If using solid coconut oil, melt it gently in a warm water bath first, then let it cool slightly before adding other oils.
- Add Essential Oils & Vitamin E: Add the geranium and sandalwood essential oils, along with Vitamin E oil.
- Mix Gently: Cap the bottle and gently mix by rolling or inverting to ensure all ingredients are well combined.
- Label: Label your bottle with the date and ingredients.
Recipe #3: Lightweight Protective Oil for Fine Hair & Daily Use
This lightweight blend protects delicate hair without weighing it down, perfect for daily application or heat protection.
Ingredients:
- Argan Oil: 40 ml (1.35 fl oz)
- Jojoba Oil: 10 ml (0.33 fl oz)
- Ylang Ylang Essential Oil: 5 drops
- Bergamot Essential Oil (Bergaptene-free for sun safety): 3 drops
Preparation:
- Combine Carrier Oils: In a clean, sterilized glass dropper bottle, mix the argan oil and jojoba oil.
- Add Essential Oils: Add the ylang ylang and bergamot (ensure it's bergaptene-free if you'll be in the sun, as regular bergamot can be photosensitizing).
- Mix Gently: Cap the bottle and gently mix to combine the oils.
- Label: Label your bottle with the date and ingredients.
Recommendations for Use and Storage
Application:
- Start Small: Begin with just 1-2 drops for the ends of your hair. You can always add more if needed, but too much will make your hair greasy.
- On Damp Hair: For best absorption and protection, apply the oil to damp, towel-dried hair after washing. This helps to lock in moisture.
- On Dry Hair: A small amount can be used on dry hair to smooth frizz, add shine, and provide a light protective barrier throughout the day. Focus only on the very ends.
- Pre-Shampoo Treatment: For deep conditioning and repair, apply a more generous amount of oil to your ends (and even throughout your hair if desired) 30 minutes to a few hours before shampooing.
- Heat Protection: A few drops can be applied to damp hair before blow-drying to help protect from heat damage.
- Frequency: Depending on your hair type and needs, use daily, every other day, or as a weekly treatment.
Storage:
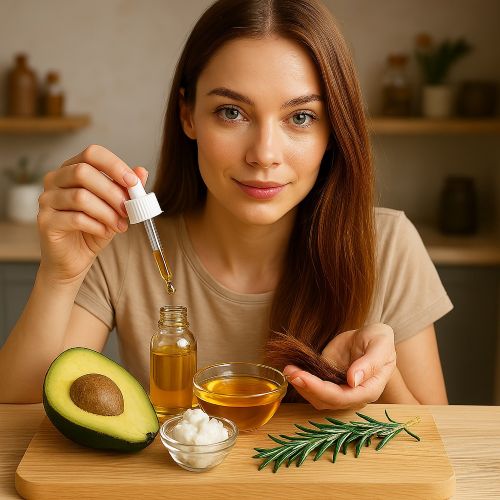
- Airtight, Dark Glass Bottles: As mentioned, store your homemade hair oil in dark amber or cobalt blue glass bottles with tight-fitting droppers. This protects the delicate oils from light and air, which can cause them to oxidize and lose potency.
- Cool, Dark Place: Keep the bottles in a cool, dark cupboard or drawer, away from direct sunlight, heat, and humidity. Avoid storing them in the bathroom if it gets very warm and steamy.
- Shelf Life: The shelf life of homemade hair oil largely depends on the carrier oils used. Most blends will last 6 months to 1 year. Vitamin E oil can help extend this by acting as an antioxidant. Always check for changes in scent (rancid smell), color, or consistency; if detected, discard the oil.
Embracing homemade hair oils for split ends is a commitment to natural beauty and healthier hair. By understanding the power of pure ingredients and mastering these simple preparation techniques, you can provide your hair with the targeted care it deserves, leading to noticeable improvements in texture, strength, and overall vitality. Say goodbye to brittle ends and hello to naturally beautiful, protected hair


Cosmetic ingredients and professional formulation blog
This section features expert materials on modern cosmetic actives. We cover peptides, polynucleotides PDRN, different forms of hyaluronic acid, retinoids, ceramides and other key components.
Special focus is given to active stability, ingredient compatibility and correct incorporation into formulas. You will find practical guides on working with anti-age actives, moisturizing complexes and barrier repair ingredients.
We examine how to properly combine myorelaxants with peptides, common mistakes when using unstable vitamin C forms and ways to improve the performance of moisturizing actives.
Separate materials are dedicated to base oils, extracts, emulsifiers and supporting ingredients. This helps create stable and effective formulas for both professional and home cosmetics.
The blog regularly publishes reviews of trending actives, comparisons of similar ingredients and step-by-step formulation recommendations. The content is aimed at formulators, technologists and anyone seriously involved in creating cosmetic products.
Why this blog is useful
Here you will find practical data on eye area care actives, lifting systems and ingredients that improve skin firmness and tone. We rely on real formulation experience and address the actual challenges that arise during product development.
You can also explore materials on skin protection and repair, depigmentation and anti-inflammatory actives. This approach supports a more systematic selection of ingredients.
FAQ
What topics are covered most often
The blog focuses on peptides, PDRN, hyaluronic acid of different molecular weights, retinoids, ceramides and their compatibility rules.
Are there practical recommendations on how to incorporate actives
Yes, most articles include practical notes on pH stability, incorporation temperature and common formulation mistakes.
Is the content only for professionals
The materials are useful both for formulators and technologists and for those who create cosmetics for personal use and want to understand how modern ingredients work.
Where can I go directly to the ingredients
All key actives are collected in the Actives section, while base components are available in base oils and related categories.