-
 DIY: Video master classes
-
 Aromatherapy
-
 Felting master classes
-
 Eating at home
-
 DIY cosmetics for children
-
 Cooking recipes
-
 Detergents, cleaning products with your own hands
-
 Soap making as a business
-
 Natural cosmetics. Raw materials for cosmetics and soap.
-
 Natural oils in cosmetics
-
 News
-
 Recipes for balms and conditioners
-
 Bath Bomb Recipes
-
 Cream recipes. Cream making.
-
 Lotion recipes. Gel recipes.
-
 Mask recipes
-
 Soap recipes. Base soap. Soap from scratch.
-
 Recipes for all occasions
-
 Natural shampoo recipes
-
 Healthy Nutrition Recipes
-
 Scrub recipes. Massage tiles. Ubtan
-
 DIY candles
-
 Reference materials, questions, tips
-
 Startup - soap production
-
 Hair care. Tips, recipes
-
 Facial skin care. Cleansers.
-
 Body care. Tips, recipes
-
 Photo Reviews
-
 Chocolate Handmade


Lip gloss with care oils and safe fragrance: formula and technology
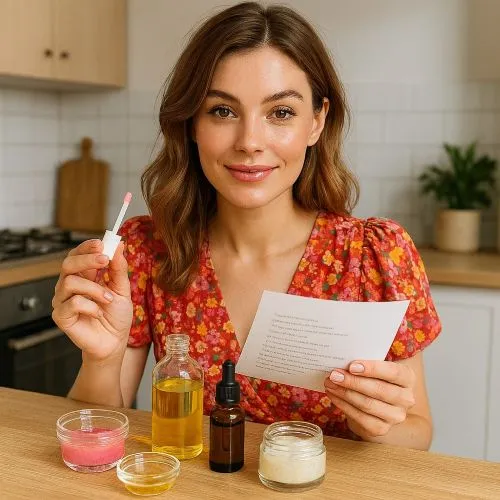 Lip gloss is a staple in many makeup bags, cherished for its ability to add shine and a touch of color. However, many commercial glosses are formulated with synthetic ingredients and heavy mineral oils that can feel sticky and offer little to no benefit for the delicate skin of the lips. For those who seek a product that is not only beautiful but also truly nourishing, crafting your own lip gloss with caring oils and safe fragrances is the perfect solution. This article will guide you through the professional formulation principles, detail the key ingredients, and provide three unique recipes, empowering you to create a high-quality, non-sticky gloss that actively moisturizes and protects your lips, offering significant advantages over industrial alternatives.
The Science of Shine: Understanding the Formula's Components
A well-formulated lip gloss is more than just shine. It’s a precise blend of emollients, waxes, and actives that work together to provide shine, longevity, and lip care.
Emollients (Caring Oils)
The heart of a great lip gloss is its oil blend. These oils provide the gloss with its texture, moisturizing properties, and shine.
-
Castor Oil: This is the base for most lip glosses. It's a thick, viscous oil that gives gloss its signature shine and excellent slip. Its high viscosity prevents the gloss from feeling too thin or runny.
-
Jojoba Oil: Mimicking the skin’s natural sebum, jojoba oil is a liquid wax that provides lightweight hydration and is quickly absorbed, preventing a greasy feel
-
Shea Butter: A rich, solid fat that adds a creamy texture and superb conditioning properties. It helps to lock in moisture and protect the lips from dryness and cracking.
-
Cocoa Butter: Known for its chocolate-like aroma and solid form, cocoa butter adds hardness to the gloss and forms a protective barrier on the lips.
Gelling Agents (Waxes)
Waxes are essential for providing structure and stability. They prevent the oils from separating and give the gloss its solid or semi-solid form in the tube or pot.
-
Beeswax: A natural wax that provides a firm structure and a protective barrier. It is widely used for its excellent stability and long-lasting hold.
-
Candelilla Wax: A vegan alternative to beeswax. It’s slightly harder than beeswax and gives the gloss a beautiful, glossy finish.
Safe Fragrances and Flavorings
Many commercial glosses use synthetic fragrances and sweeteners that can be irritating. A safe, homemade gloss prioritizes non-irritating alternatives.
-
Cosmetic-Grade Flavor Oils: These are specifically formulated to be safe for lip products. They are often phthalate-free and are available in a wide range of flavors, from classic vanilla to fruity blends.
-
Essential Oils: While many are too potent for lip products, a few can be used in tiny amounts for scent, such as sweet orange or peppermint oil, but always check for safety and use very low concentrations.
Nuances of Preparation: Mastering the Technology
Creating a professional-quality lip gloss at home requires attention to detail and precise temperature control.
-
Sanitation is Essential: Sterilize all your tools, beakers, and containers with rubbing alcohol to prevent any microbial growth. This is especially important since lip products are applied directly to the mouth.
-
Melting Waxes and Butters: The key is a gentle, steady heat. Use a double boiler or a heat-resistant beaker in a pot of simmering water. Do not melt the ingredients directly over high heat, as this can degrade them and cause uneven melting.
-
Homogenization: After the waxes and butters are fully melted, add the liquid oils. Stir continuously to ensure a homogenous blend. The mixture will look clear and uniform.
-
Adding Actives and Fragrance: These ingredients are heat-sensitive. Add them only when the mixture has cooled slightly, typically below 50°C (122°F). This prevents the fragrance from evaporating and the actives from degrading.
-
Pouring Technique: Once the mixture is fully blended and has reached a pourable consistency, carefully transfer it into your lip gloss tubes or pots. Work quickly before the mixture begins to solidify.
Three Detailed Recipes for a Nourishing Lip Gloss
These recipes offer a blend of shine, moisture, and beautiful texture. Each recipe is for a small batch, perfect for fresh, home-made products.
Recipe 1: Classic Shine with a Vanilla Swirl
This is a balanced formula that provides excellent shine and a classic, comforting flavor.
-
Prepare the wax and butter phase. In a heat-safe beaker, weigh 5g of beeswax and 5g of shea butter. Gently melt them in a double boiler.
-
Add the oils. Once the beeswax and shea butter are fully melted, add 15g of castor oil and 5g of jojoba oil. Stir until the mixture is uniform.
-
Cool and add fragrance. Remove the beaker from the heat and allow the mixture to cool slightly. When it's warm but not hot, add 10-15 drops of a cosmetic-grade vanilla flavor oil.
-
Pour and set. Pour the liquid gloss into sterilized lip gloss tubes using a syringe or a small funnel. Allow to cool completely before capping.
Recommendations for Use: Apply a small amount to your lips as needed for shine and hydration.
Storage: Store in a cool, dry place. The shelf life is up to one year.
Recipe 2: The Vegan Gloss with a Peppermint Tingle
This recipe uses a plant-based wax and adds a refreshing feel with a touch of peppermint.
-
Prepare the wax and butter phase. In a heat-safe beaker, weigh 5g of candelilla wax and 5g of cocoa butter. Gently melt them in a double boiler.
-
Add the oils. Once the wax and butter are fully melted, add 20g of castor oil and 5g of sweet almond oil. Stir until the mixture is uniform.
-
Cool and add essential oil. Remove from heat and let it cool slightly. Add 5 drops of peppermint essential oil (ensure it’s cosmetic-grade and safe for lips). Stir well.
-
Pour and set. Pour the mixture into sterilized lip gloss tubes. Allow it to cool and harden completely before use.
Recommendations for Use: Apply to lips for a cooling, refreshing sensation and a hint of shine.
Storage: Store in a cool, dry place. The shelf life is up to one year.
Recipe 3: Hydrating Gloss with a Tint of Color
This recipe adds a subtle tint for a beautiful, natural look while providing intense hydration.
-
Prepare the wax and butter phase. In a heat-safe beaker, weigh 5g of beeswax and 5g of shea butter. Gently melt them in a double boiler.
-
Add the oils. Add 15g of castor oil and 5g of jojoba oil. Stir until the mixture is uniform.
-
Add colorant. Add a pinch of cosmetic-grade mica powder (e.g., a rose or bronze color). Use a stirring rod to mix the powder into the liquid gloss until there are no clumps.
-
Cool and add fragrance. Remove from heat. Let it cool slightly, then add 10-15 drops of your chosen flavor oil.
-
Pour and set. Pour the mixture into your lip gloss containers and let them cool completely.
Recommendations for Use: A perfect everyday gloss for a subtle hint of color and hydration.
Storage: Store in a cool, dry place. The shelf life is up to one year.
Advantages of a Homemade Lip Gloss over Industrial Analogues
Choosing to make your own lip gloss offers significant benefits that commercial products often can't match.
-
Ingredient Transparency and Purity: You have complete control over what goes into your product. You can avoid cheap fillers, synthetic polymers, and potential irritants found in many commercial formulas.
-
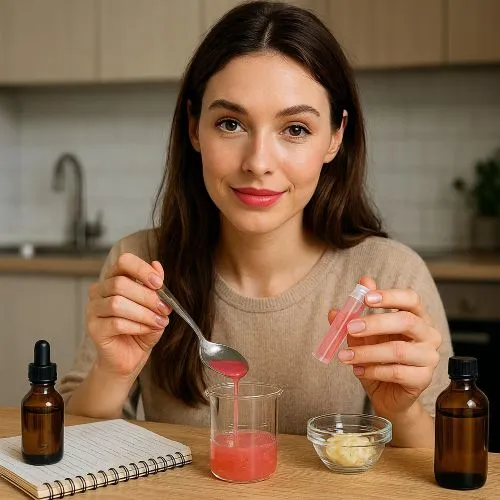 Superior Nourishment: Homemade glosses prioritize caring oils like shea butter and jojoba oil, which provide real, long-lasting hydration, unlike mineral oil-based industrial glosses that simply sit on the surface.
-
Customization: You can tailor the consistency, shine, flavor, and tint to your personal preferences. Adjust the wax content for a firmer gloss or the oil blend for a more liquid feel.
-
Cost-Effectiveness: The initial investment in raw materials is a one-time cost that allows you to make dozens of glosses for a fraction of the price of a single high-end commercial product.
-
Reduced Stickiness: By carefully balancing the ratio of waxes to oils, you can create a gloss that is smooth and comfortable to wear, avoiding the heavy, sticky feeling of many mass-market options.
Crafting your own lip gloss is not just a fun activity; it is a conscious choice to create a product that is cleaner, more effective, and perfectly tailored to your needs.


Cosmetic ingredients and professional formulation blog
This section features expert materials on modern cosmetic actives. We cover peptides, polynucleotides PDRN, different forms of hyaluronic acid, retinoids, ceramides and other key components.
Special focus is given to active stability, ingredient compatibility and correct incorporation into formulas. You will find practical guides on working with anti-age actives, moisturizing complexes and barrier repair ingredients.
We examine how to properly combine myorelaxants with peptides, common mistakes when using unstable vitamin C forms and ways to improve the performance of moisturizing actives.
Separate materials are dedicated to base oils, extracts, emulsifiers and supporting ingredients. This helps create stable and effective formulas for both professional and home cosmetics.
The blog regularly publishes reviews of trending actives, comparisons of similar ingredients and step-by-step formulation recommendations. The content is aimed at formulators, technologists and anyone seriously involved in creating cosmetic products.
Why this blog is useful
Here you will find practical data on eye area care actives, lifting systems and ingredients that improve skin firmness and tone. We rely on real formulation experience and address the actual challenges that arise during product development.
You can also explore materials on skin protection and repair, depigmentation and anti-inflammatory actives. This approach supports a more systematic selection of ingredients.
FAQ
What topics are covered most often
The blog focuses on peptides, PDRN, hyaluronic acid of different molecular weights, retinoids, ceramides and their compatibility rules.
Are there practical recommendations on how to incorporate actives
Yes, most articles include practical notes on pH stability, incorporation temperature and common formulation mistakes.
Is the content only for professionals
The materials are useful both for formulators and technologists and for those who create cosmetics for personal use and want to understand how modern ingredients work.
Where can I go directly to the ingredients
All key actives are collected in the Actives section, while base components are available in base oils and related categories.


