-
 DIY: Video master classes
-
 Aromatherapy
-
 Felting master classes
-
 Eating at home
-
 DIY cosmetics for children
-
 Cooking recipes
-
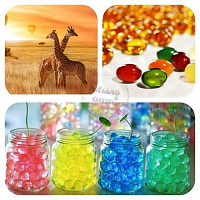
 Detergents, cleaning products with your own hands
-
 Soap making as a business
-
 Natural cosmetics. Raw materials for cosmetics and soap.
-
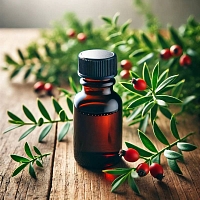
 Natural oils in cosmetics
-
 News
News
-
 Recipes for balms and conditioners
-
 Bath Bomb Recipes
-
 Cream recipes. Cream making.
-
 Lotion recipes. Gel recipes.
-
 Mask recipes
-
 Soap recipes. Base soap. Soap from scratch.
-
 Recipes for all occasions
-
 Natural shampoo recipes
-
 Healthy Nutrition Recipes
-
 Scrub recipes. Massage tiles. Ubtan
-
 DIY candles
-
 Reference materials, questions, tips
-
 Startup - soap production
-
 Hair care. Tips, recipes
-
 Facial skin care. Cleansers.
-
 Body care. Tips, recipes
-
 Photo Reviews
-
 Chocolate Handmade


Soap making from scratch: Cold process
 Cold process soap making isn't just about hygiene; it's about unleashing your inner artist. Imagine transforming everyday oils into vibrant, customized bars bursting with fragrance and functionality. This guide will equip you with the knowledge and confidence to embark on this rewarding adventure.
Understanding the Science:
At its core, cold process soap making is a beautiful dance between chemistry and creativity. We combine fats and oils (like olive or coconut) with sodium hydroxide (lye), a strong alkali. This triggers a process called saponification, where the lye breaks down the oils, forming soap and glycerin (a natural humectant).
Safety First:
Lye can be caustic, so prioritizing safety is paramount. Here are some non-negotiables:
- Work in a well-ventilated area.
- Wear protective gear: goggles, gloves, long sleeves, and a respirator.
- Never add water to lye; always add lye to water slowly.
Gathering Your Supplies:
- Digital Scale: Ensures accurate measurements for a successful batch.
- Stick Blender: Emulsifies the oils and lye solution for a smooth, even soap.
- Silicone Molds: Readily available and easy to clean. Opt for freezer-safe molds for faster curing.
- Safety Gear: See above.
- Sodium Hydroxide (lye): Purchase from a reputable soap making supplier.
- Oils: Choose a blend that caters to your desired soap properties (cleansing, moisturizing, etc.). Popular options include olive, coconut, and shea butter.
- Optional Extras: Experiment with colorants, essential oils, botanicals (like oatmeal or lavender), and clays for a truly customized experience.
Crafting Your First Masterpiece: A Basic Soap Recipe
This recipe creates a gentle, cleansing bar:
- Oils:
- Olive Oil: 30% (180g)
- Coconut Oil: 30% (180g)
- Shea Butter: 40% (240g)
- Lye Solution:
- Sodium Hydroxide: 112g
- Distilled Water: 336g (the weight of your oils divided by 3)
 The Process:
-
Prepare your Lye Solution: In a well-ventilated area, carefully weigh out your lye and water. Slowly add the lye to the water, stirring constantly. The mixture will heat up. Let it cool completely before proceeding (around room temperature).
-
Weigh and Melt your Oils: While the lye solution cools, weigh out your oils and gently melt them in a heat-resistant container using a double boiler method (placing the container over simmering water).
-
Trace Stage is Key: Once both the lye solution and oils reach around 70-80°F (21-27°C), it's time to blend. Slowly drizzle the lye solution into the oils while continuously blending with your stick blender. The mixture will thicken, eventually reaching a stage called "trace." This is when the mixture resembles pudding and leaves visible trails when dripped.
-
Pour and Personalize: Pour the soap batter into your prepared mold. This is where the fun begins! You can add a few drops of essential oil for fragrance, a sprinkle of botanicals for exfoliation, or a touch of natural colorant to create stunning swirls.
-
Curing for Perfection: Cover your mold with insulation (like towels) to trap heat and aid in the saponification process. Let the soap cure for 24-48 hours, then unmold and cut into bars. Patience is key - allow the bars to cure for an additional 4-6 weeks before use to ensure a properly hardened and gentle soap.
Beyond the Basics:
This is just the beginning! As you gain experience, explore advanced techniques like layering, embeds, and soap frosting. There's a whole world of creative possibilities waiting to be discovered.
Embrace the Journey:
Cold process soap making is a rewarding journey that allows you to express your creativity while crafting luxurious, all-natural products. With a little practice and this guide as your compass, you'll be well on your way to becoming a master soap artisan. So, grab your supplies, unleash your inner artist, and get ready to transform everyday oils into little works of art!
";s:4:"TYPE";s:4:"HTML";}Mylo Opt Cosmetics Blog – Your Reliable Guide to Beauty and Care
Welcome to the Mylo Opt cosmetics blog! Here, you will find valuable advice, interesting recipes, and professional recommendations for creating soap, cosmetics, and candles with your own hands. Our blog is designed for anyone passionate about natural cosmetics, looking for new ideas, and wanting to learn more about producing high-quality skincare and haircare products. We share tested recipes, useful tips, and the latest news from the world of cosmetics.
Why Choose the Mylo Opt Cosmetics Blog?
Mylo Opt is not just an online store; it is a community of people passionate about creating natural cosmetics. Here are a few reasons why our blog will be useful to you:
- Experience and Expertise: Our authors are experienced cosmetologists, soap makers, and aromatherapy specialists. We share reliable and tested recipes that have undergone thorough testing and received positive feedback.
- Credibility and Authority: We ensure that all information in our blog is up-to-date and reliable. We reference scientific research and verified sources so that you can trust the quality of the information provided.
- Reader-Focused: Our content is tailored to you – our readers. We strive to answer your questions, solve your problems, and inspire new achievements in the world of natural cosmetics.
Popular Products from the Mylo Opt Online Store
Before we move on to recipes and tips, let us introduce you to the most popular products from our online store, which will help you create high-quality and natural cosmetics:
- Soap Bases: High-quality soap bases allow you to create beautiful and beneficial handmade soaps. We offer glycerin bases, bases with added oils and extracts, as well as transparent and white bases.
- Fragrance Oils and Fragrances: Give your products a unique scent with our fragrance oils and fragrances. We offer a wide range of scents – from fresh and floral to spicy and woody.
- Essential Oils: Essential oils are natural components that not only add fragrance to products but also offer beneficial properties for the skin and hair. Our range includes lavender, mint, eucalyptus, lemon, and many other oils.
- Active Ingredients: Vitamins, antioxidants, hyaluronic acid, and other active ingredients help improve the properties of your cosmetics. We offer only tested and high-quality components.
- Pigments and Dyes: Give your products bright and lasting colors with our pigments and dyes. They are safe for the skin and suitable for use in soap, cosmetics, and candles.
- Emulsifiers and Thickeners: To create creams and lotions, you will need emulsifiers and thickeners. We offer quality ingredients that help you achieve the desired consistency and stability of the product.
- Soap and Candle Molds: Create unique items with our soap and candle molds. Our range includes molds of various sizes and designs.
- Everything for Candles: Wax, wicks, fragrances, and dyes for candles – we have everything you need to create beautiful and fragrant candles.
Recipes and Tips for Making Handmade Soap
Cold Process Soap for Beginners
Making cold process soap is an exciting process that allows you to control all the ingredients and create unique recipes. Here is one simple cold process soap recipe for beginners:
Ingredients:
- 500 g olive oil
- 300 g coconut oil
- 200 g palm oil
- 150 g castor oil
- 120 g lye (sodium hydroxide)
- 300 ml distilled water
- Essential oils (lavender, mint, eucalyptus)
- Pigments or natural dyes (optional)
Process:
- Prepare all ingredients and tools. Always use protective gloves and goggles, as lye can be dangerous.
- Weigh the lye and water. Slowly add the lye to the water, stirring until it fully dissolves. Allow the mixture to cool to 40-45°C.
- Weigh the oils and melt them in a water bath. When the oils and lye solution reach the same temperature (about 40-45°C), slowly pour the lye into the oils, stirring constantly.
- Use an immersion blender to mix until trace (when the mixture thickens and leaves a trail when stirred).
- Add essential oils and pigments if desired. Mix thoroughly.
- Pour the mixture into a prepared mold and cover with a towel. Let the soap harden for 24-48 hours.
- Remove the soap from the mold and cut it into bars. Allow the soap to cure for 4-6 weeks before use.
Homemade Cosmetics Recipes
DIY Moisturizing Cream
Creating a moisturizing cream at home allows you to control the ingredients and adapt the recipe to your needs. Here is a simple recipe for a moisturizing cream:
Ingredients:
- 50 ml rose water
- 50 ml distilled water
- 10 g emulsifier (e.g., Olivem 1000)
- 10 ml jojoba oil
- 5 ml avocado oil
- 5 drops lavender essential oil
- 2 drops tea tree essential oil
Process:
- Weigh all the ingredients.
- In a water bath, melt the emulsifier with the oils until smooth.
- Separately, heat the water phase (rose water and distilled water) to the same temperature as the oil phase.
- Slowly pour the water phase into the oil phase, stirring constantly.
- Use an immersion blender to emulsify until you achieve a creamy consistency.
- Add essential oils and mix thoroughly.
- Pour the cream into a sterilized jar and allow it to cool.
DIY Candle Recipes
Aromatic Soy Candle
Creating aromatic candles is a creative process that allows you to experiment with scents and designs. Here is a simple recipe for a soy candle:
Ingredients:
- 200 g soy wax
- 20 ml fragrance oil (e.g., vanilla or lavender)
- Wick for candles
- Dyes (optional)
- Glass or metal candle mold
Process:
- Melt the soy wax in a water bath until liquid.
- Add the fragrance oil and dyes if desired. Mix thoroughly.
- Secure the wick in the center of the candle mold.
- Slowly pour the melted wax into the mold, holding the wick.
- Allow the candle to fully harden (about 24 hours).
- Trim the wick to the desired length and enjoy your aromatic candle.
Tips for Beginners in Cream Making
- Learn the Basics: Before starting to create creams, it is important to learn the basic principles and ingredients used in cream making.
- Experiment with Formulas: Do not be afraid to experiment with different ingredients and proportions to find the perfect formula for your skin.
- Use Quality Ingredients: The effectiveness and safety of your product depend on the quality of the ingredients. Always choose tested and natural components.
- Maintain Hygiene: It is important to maintain cleanliness and sterility when creating cosmetics to avoid contamination and spoilage of the product.
- Start with Simple Recipes: For beginners, it is best to start with simple recipes to master the basic techniques and principles of cream making.
Conclusion
Our Mylo Opt cosmetics blog is your reliable source of information and inspiration in the world of natural cosmetics. We share useful tips, tested recipes, and the latest news to help you create quality and effective products for skin, hair, and home care. Subscribe to our blog, follow the updates, and discover new opportunities in the world of natural cosmetics with Mylo Opt!