Article sections
-
 DIY: Video master classes
-
 Aromatherapy
-
 Felting master classes
-
 Eating at home
-
 DIY cosmetics for children
-
 Cooking recipes
-
 Detergents, cleaning products with your own hands
-
 Soap making as a business
-
 Natural cosmetics. Raw materials for cosmetics and soap.
-
 Natural oils in cosmetics
-
 News
-
 Recipes for balms and conditioners
-
 Bath Bomb Recipes
-
 Cream recipes. Cream making.
-
 Lotion recipes. Gel recipes.
-
 Mask recipes
-
 Soap recipes. Base soap. Soap from scratch.
-
 Recipes for all occasions
-
 Natural shampoo recipes
-
 Healthy Nutrition Recipes
-
 Scrub recipes. Massage tiles. Ubtan
-
 DIY candles
-
 Reference materials, questions, tips
-
 Startup - soap production
-
 Hair care. Tips, recipes
-
 Facial skin care. Cleansers.
-
 Body care. Tips, recipes
-
 Photo Reviews
-
 Chocolate Handmade
DIY lip gloss: a simple recipe for a radiant look
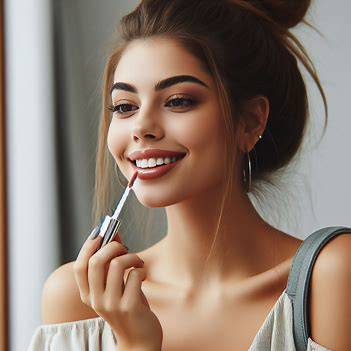 Looking for a fun and creative way to achieve a radiant, personalized pout? Look no further than DIY lip gloss! With just a few simple ingredients and readily available tools, you can whip up your own custom lip gloss that perfectly complements your style and preferences. Not only is this a budget-friendly option, but it also allows you to control the ingredients and customize the color, scent, and even texture of your lip gloss.
Here's everything you'll need to get started on your DIY lip gloss adventure:
Ingredients:
- Carrier Oil (1 tablespoon): Choose from nourishing options like sweet almond oil, jojoba oil, coconut oil, or even castor oil for a thicker consistency.
- Beeswax Pastilles (1 teaspoon): This natural ingredient provides structure and hold to your lip gloss.
- Mica Powder (optional): For a touch of shimmer and playful color, mica powder comes in a wide variety of dazzling shades. Start with a small amount and gradually add more to achieve your desired level of shimmer.
- Natural Food Coloring (optional): A few drops of beetroot powder or a touch of melted cocoa butter can add a subtle hint of color to your lip gloss. Experiment with different natural colorants to find your perfect shade.
- Essential Oil (1-2 drops, optional): For a delightful scent and additional benefits, consider essential oils like peppermint (cooling), vanilla (sweet), or lavender (calming). Be sure to choose lip-safe essential oils and use them sparingly.
- Vitamin E Oil (1 capsule): This antioxidant helps preserve your lip gloss and provides a touch of moisture.
Equipment:
- Small heat-resistant glass jar or bowl
- Double boiler (or a makeshift version using a saucepan and smaller heat-resistant bowl)
- Spoon for stirring
- Small cosmetic containers (tubes or tins) for storing your finished lip gloss
- Optional: Funnel for transferring the lip gloss into containers
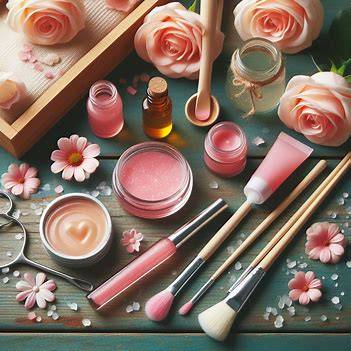 Instructions:
- Prepare your workspace: Ensure your work area is clean and free of clutter.
- Set up your double boiler: Fill the saucepan with a couple of inches of water and bring it to a simmer. Place the heat-resistant glass jar or bowl on top of the saucepan, ensuring it doesn't touch the simmering water.
- Melt the beeswax: Add the beeswax pastilles to the glass jar and heat them gently, stirring occasionally, until they melt completely.
- Incorporate the carrier oil: Once the beeswax is melted, slowly add your chosen carrier oil and stir well to combine.
- Customize your lip gloss (optional): Now comes the fun part - customization! If you desire a shimmery lip gloss, add a small amount of mica powder and stir it in until evenly distributed. For a touch of color, introduce a few drops of your preferred natural food coloring, mixing thoroughly. Essential oils can be added at this stage as well.
- Vitamin E boost: Pierce a Vitamin E capsule and squeeze the oil into the mixture. Stir well.
- Cooling down: Remove the jar from the heat and allow the mixture to cool slightly before transferring it to your chosen containers.
- Filling the containers: Use a funnel (optional) to carefully pour the lip gloss into your clean and dry cosmetic containers.
- Let it set: Allow your DIY lip gloss to cool and solidify completely before using it. This may take up to an hour.
Tips for Success:
- Safety first! Never use heat directly on essential oils or plastic containers.
- Less is more: Start with a small amount of colorant or mica powder and gradually add more until you achieve the desired effect.
- Label your creations: Clearly label your lip gloss with the ingredients and date of creation for future reference.
- Storage: Store your DIY lip gloss in a cool, dry place away from direct sunlight. Generally, homemade lip gloss has a shorter shelf life than commercially produced products, so aim to use it within a few months.
Embrace your creativity and have fun experimenting with different ingredients and color combinations to create a unique and personalized lip gloss that makes your pout shine!
" 20.05.2024