-
 DIY: Video master classes
-
 Aromatherapy
-
 Felting master classes
-
 Eating at home
-
 DIY cosmetics for children
-
 Cooking recipes
-
 Detergents, cleaning products with your own hands
-
 Soap making as a business
-
 Natural cosmetics. Raw materials for cosmetics and soap.
-
 Natural oils in cosmetics
-
 News
News
-
 Recipes for balms and conditioners
-
 Bath Bomb Recipes
-
 Cream recipes. Cream making.
-
 Lotion recipes. Gel recipes.
-
 Mask recipes
-
 Soap recipes. Base soap. Soap from scratch.
-
 Recipes for all occasions
-
 Natural shampoo recipes
-
 Healthy Nutrition Recipes
-
 Scrub recipes. Massage tiles. Ubtan
-
 DIY candles
-
 Reference materials, questions, tips
-
 Startup - soap production
-
 Hair care. Tips, recipes
-
 Facial skin care. Cleansers.
-
 Body care. Tips, recipes
-
 Photo Reviews
-
 Chocolate Handmade
How to Make Your Own Hyaluronic Serum
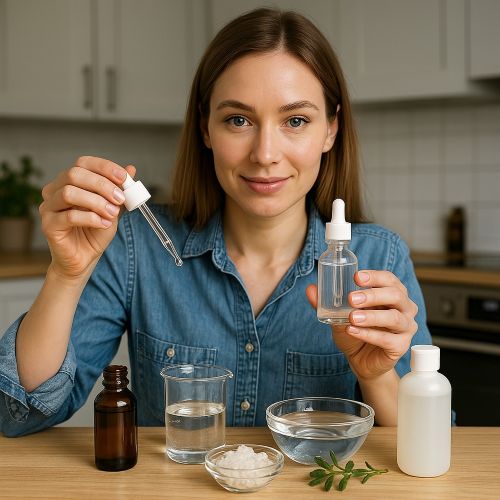 In the vast world of skincare, few ingredients boast the hydrating prowess of hyaluronic acid (HA). Renowned for its ability to hold up to 1,000 times its weight in water, HA is a powerful humectant that draws moisture from the air into your skin, leaving it plump, supple, and visibly youthful. While a plethora of hyaluronic acid serums are available on the market, crafting your own offers unparalleled control over ingredient quality, concentration, and freshness, allowing for truly personalized skincare.
This comprehensive guide will demystify the process of making your own hyaluronic serum. We will delve into the remarkable benefits of hyaluronic acid, compare homemade serums to their industrial counterparts, and provide three detailed recipes tailored to different skin needs. Get ready to embark on a rewarding DIY skincare journey that promises deep hydration and a radiant complexion.
The Science of Hydration: Understanding Hyaluronic Acid
Hyaluronic acid is a naturally occurring glycosaminoglycan found throughout the body, with the highest concentrations in the skin, connective tissues, and eyes. Its primary function is to retain water, ensuring tissues remain well-lubricated and hydrated. In skincare, HA acts as a humectant, meaning it attracts and binds moisture, effectively:
- Deeply Hydrating the Skin: It provides intense hydration, preventing dryness and flakiness, even in harsh environments.
- Plumping Fine Lines and Wrinkles: By infusing skin with moisture, HA can temporarily plump up the skin, making fine lines and wrinkles less noticeable.
- Improving Skin Elasticity: Well-hydrated skin is more elastic, contributing to a firmer and more resilient complexion.
- Enhancing Barrier Function: A healthy moisture barrier is crucial for protecting the skin from environmental aggressors. HA helps fortify this barrier, leading to healthier skin.
- Soothing and Calming: HA is known for its gentle nature, making it suitable for even sensitive or compromised skin. It can help reduce redness and irritation.
Hyaluronic acid comes in various molecular weights. High molecular weight (HMW) HA forms a film on the skin's surface, offering immediate hydration and barrier protection. Low molecular weight (LMW) HA can penetrate deeper, providing hydration to lower epidermal layers and potentially stimulating collagen production. Combining different molecular weights in your DIY serum can offer a more comprehensive hydration strategy.
Why Make Your Own Hyaluronic Serum? Advantages Over Industrial Analogues
- Purity and Transparency: You control every ingredient, ensuring your serum is free from synthetic fragrances, dyes, parabens, phthalates, and other potentially irritating additives commonly found in commercial formulations. You know exactly what goes on your skin.
- Freshness and Potency: Homemade serums are made in small batches, guaranteeing the freshest and most potent ingredients. Over time, active ingredients in commercial products can degrade, losing their efficacy.
- Cost-Effectiveness: While the initial investment in raw materials might seem higher, in the long run, making your own serum is significantly more economical than consistently purchasing high-end commercial brands.
- Customization: You can tailor the concentration of hyaluronic acid and incorporate additional beneficial ingredients (like vitamins, botanical extracts, or other humectants) to precisely match your skin's unique needs and preferences.
- Environmental Impact: Reducing reliance on single-use plastic packaging and utilizing bulk raw materials contributes to a more sustainable and eco-conscious beauty routine.
- Educational and Empowering: The process of creating your own skincare product is not only practical but also deeply satisfying, empowering you with knowledge about ingredient functionality.
Recipe #1: Basic Hydrating Hyaluronic Serum
This foundational recipe is perfect for beginners and provides effective, straightforward hydration.
Ingredients:
- High Molecular Weight (HMW) Hyaluronic Acid Powder: 0.5 grams (approx. 1/4 teaspoon)
- Distilled Water or Hydrosol (e.g., Rose, Chamomile): 49.5 ml
- Liquid Preservative (e.g., Geogard 221, Liquid Germall Plus, or Euxyl PE 9010): 0.5 ml (or according to manufacturer's instructions for 50ml total volume)
- Sterilized Glass Dropper Bottle (50ml): 1
Preparation:
- Sterilization is Crucial: Meticulously sterilize all your tools (beakers, stirrers, measuring spoons/syringes) and the final glass dropper bottle. You can do this by washing thoroughly with hot soapy water, rinsing, and then either boiling them for 10 minutes or spritzing with 70% isopropyl alcohol and allowing to air dry completely. Any contamination can lead to bacterial growth and spoilage.
- Measure Water/Hydrosol: Accurately measure 49.5 ml of distilled water or your chosen hydrosol into a clean, sterilized beaker or container.
- Add Hyaluronic Acid Powder: Carefully sprinkle the 0.5 grams of HMW hyaluronic acid powder over the surface of the water/hydrosol. Avoid dumping it all at once, as it can clump.
- Hydration Process: Cover the container (to prevent dust/contamination) and let it sit undisturbed for at least 4-6 hours, or ideally overnight, in a cool place. The hyaluronic acid will slowly absorb the water and thicken into a gel. Avoid stirring aggressively during this phase, as it can introduce air bubbles and prolong the hydration process.
- Gentle Stirring: After the hydration period, gently stir the mixture with a sterilized spoon or glass rod until it's a clear, uniform gel with no visible clumps of powder. If there are still lumps, let it sit longer.
- Add Preservative: Measure and add 0.5 ml of your chosen liquid preservative to the hyaluronic acid gel. Stir gently but thoroughly to ensure the preservative is evenly distributed throughout the serum. This step is absolutely essential for any water-based product to prevent bacterial, fungal, and mold growth.
- Transfer to Bottle: Carefully pour the finished hyaluronic serum into your sterilized 50ml glass dropper bottle.
Application and Storage:
Apply 2-3 drops to a clean, slightly damp face and neck twice daily, morning and evening, before your moisturizer. It can also be applied to other areas of the body needing hydration. Store the serum in a cool, dark place, ideally in the refrigerator, for up to 2-3 months. Discard immediately if you notice any changes in color, smell, or consistency, which could indicate bacterial growth.
Recipe #2: Advanced Hydrating & Soothing Serum with Multiple HA Weights and Allantoin
This recipe combines different molecular weights of HA for multi-layered hydration and adds allantoin for its soothing and skin-conditioning properties.
Ingredients:
- High Molecular Weight (HMW) Hyaluronic Acid Powder: 0.3 grams
- Low Molecular Weight (LMW) Hyaluronic Acid Powder: 0.2 grams
- Distilled Water: 47.5 ml
- Vegetable Glycerin or Propanediol 1,3: 2 ml
- Allantoin Powder: 0.5 grams
- Liquid Preservative (e.g., Optiphen Plus or Cosgard): 0.5 ml (or according to manufacturer's instructions for 50ml total volume)
- Sterilized Glass Dropper Bottle (50ml): 1
Preparation:
- Sterilization: Ensure all equipment and the final container are meticulously sterilized and completely dry.
- Prepare Allantoin Solution: In a small, separate sterilized container, dissolve the 0.5 grams of allantoin powder in 5 ml of distilled water (taken from the 47.5 ml total). Allantoin can be tricky to dissolve; gentle warming in a water bath can help. Stir until completely clear.
- Combine Hydration Liquids: In your main sterilized beaker, combine the remaining 42.5 ml of distilled water with 2 ml of vegetable glycerin or propanediol 1,3.
- Add HA Powders: Sprinkle both HMW and LMW hyaluronic acid powders over the surface of the combined hydration liquids.
- Hydration Process: Cover and let hydrate for 6-8 hours, or overnight, in a cool place, until a uniform gel forms.
- Combine All Solutions: Once the HA gel is ready, gently stir in the dissolved allantoin solution. Mix thoroughly.
- Add Preservative: Measure and add 0.5 ml of your chosen liquid preservative. Stir gently but thoroughly until fully incorporated.
- Transfer to Bottle: Carefully pour the finished serum into your sterilized 50ml glass dropper bottle.
Application and Storage:
Apply 2-3 drops to clean, slightly damp skin morning and evening. This serum is particularly beneficial for soothing irritated or sensitive skin while providing deep hydration. Store in the refrigerator for up to 2-3 months. Due to multiple active ingredients, vigilance for changes in appearance is crucial.
Recipe #3: Antioxidant-Rich Hyaluronic Serum with Green Tea Extract
This recipe combines the hydrating power of HA with the antioxidant benefits of green tea extract, offering protection against environmental damage and enhancing skin vitality.
Ingredients:
- High Molecular Weight (HMW) Hyaluronic Acid Powder: 0.5 grams
- Distilled Water: 45 ml
- Green Tea Extract (liquid, water-soluble): 3 ml
- Panthenol (Pro-Vitamin B5): 1 ml
- Liquid Preservative (e.g., Preservative Eco/Geogard Ultra): 0.5 ml (or according to manufacturer's instructions for 50ml total volume)
- Sterilized Glass Dropper Bottle (50ml): 1
Preparation:
- Sterilization: Ensure all equipment and the final container are absolutely sterile and dry.
- Prepare HA Hydration: Sprinkle 0.5 grams of HMW hyaluronic acid powder over 45 ml of distilled water in a sterilized beaker. Cover and let hydrate overnight until a clear gel forms.
- Add Actives: Once the HA gel is fully formed, gently stir in the 3 ml of liquid green tea extract and 1 ml of panthenol. Mix thoroughly but gently to avoid excess air bubbles.
- Add Preservative: Measure and add 0.5 ml of your chosen liquid preservative. Stir well to ensure even distribution throughout the serum.
- Transfer to Bottle: Carefully pour the finished serum into your sterilized 50ml glass dropper bottle.
Application and Storage:
Apply 2-3 drops to clean, slightly damp skin daily, especially in the morning, to benefit from the antioxidant protection throughout the day. Follow with your regular moisturizer. Store in the refrigerator for up to 2 months. The botanical extract may slightly alter the serum's color over time, but as long as there are no changes in smell or consistency, it should be fine.
General Recommendations for Using and Storing Homemade Serums
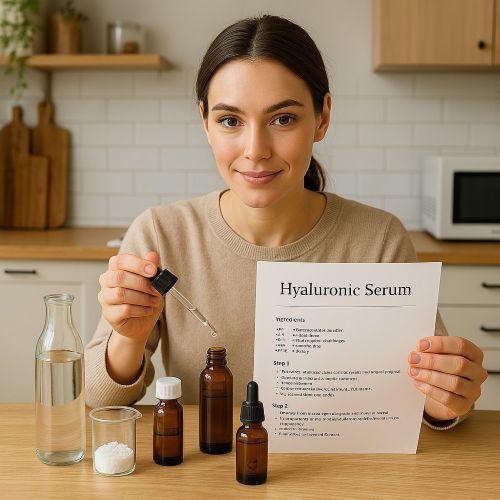
- Sterilization is Non-Negotiable: This cannot be stressed enough. Any bacteria introduced during preparation will multiply rapidly in a water-based product, leading to spoilage and potential skin issues.
- Always Use a Preservative: Any cosmetic product containing water (which all these hyaluronic serums do) *must* include a broad-spectrum cosmetic preservative. Without it, your serum will spoil within days, posing a risk to your skin. Choose a preservative suitable for your skin type and approved for cosmetic use.
- Quality of Ingredients: Source your hyaluronic acid powder and other ingredients from reputable cosmetic ingredient suppliers. Purity and proper molecular weight are crucial for efficacy and safety.
- Storage: Store your homemade hyaluronic serum in an airtight, dark glass dropper bottle. Light and air can degrade active ingredients. Refrigeration is highly recommended for all homemade water-based serums to extend their shelf life.
- Shelf Life: Homemade serums, even with preservatives, typically have a shorter shelf life than commercial products (usually 2-3 months). Always check for any changes in color, smell, clarity, or consistency. If anything seems off, discard the product immediately.
- Patch Test: Before applying any new homemade serum to your entire face, perform a patch test on a small, inconspicuous area of skin (e.g., behind the ear or on the inner forearm) and wait 24-48 hours to check for any adverse reactions.
- Apply to Damp Skin: Hyaluronic acid works best when it has moisture to draw from. Applying your serum to slightly damp skin (after cleansing and toning) helps it function optimally.
- Follow with Occlusive: Always follow your hyaluronic serum with a moisturizer or facial oil. This creates an occlusive layer that helps seal in the moisture that HA has drawn to your skin, preventing it from evaporating.
Crafting your own hyaluronic serum is an empowering step towards a more informed and customized skincare routine. With a little care and attention to detail, you can create a high-quality, effective product that delivers exceptional hydration and helps maintain your skin's youthful radiance, all while understanding exactly what you're putting on your skin.
Mylo Opt Cosmetics Blog – Your Reliable Guide to Beauty and Care
Welcome to the Mylo Opt cosmetics blog! Here, you will find valuable advice, interesting recipes, and professional recommendations for creating soap, cosmetics, and candles with your own hands. Our blog is designed for anyone passionate about natural cosmetics, looking for new ideas, and wanting to learn more about producing high-quality skincare and haircare products. We share tested recipes, useful tips, and the latest news from the world of cosmetics.
Why Choose the Mylo Opt Cosmetics Blog?
Mylo Opt is not just an online store; it is a community of people passionate about creating natural cosmetics. Here are a few reasons why our blog will be useful to you:
- Experience and Expertise: Our authors are experienced cosmetologists, soap makers, and aromatherapy specialists. We share reliable and tested recipes that have undergone thorough testing and received positive feedback.
- Credibility and Authority: We ensure that all information in our blog is up-to-date and reliable. We reference scientific research and verified sources so that you can trust the quality of the information provided.
- Reader-Focused: Our content is tailored to you – our readers. We strive to answer your questions, solve your problems, and inspire new achievements in the world of natural cosmetics.
Popular Products from the Mylo Opt Online Store
Before we move on to recipes and tips, let us introduce you to the most popular products from our online store, which will help you create high-quality and natural cosmetics:
- Soap Bases: High-quality soap bases allow you to create beautiful and beneficial handmade soaps. We offer glycerin bases, bases with added oils and extracts, as well as transparent and white bases.
- Fragrance Oils and Fragrances: Give your products a unique scent with our fragrance oils and fragrances. We offer a wide range of scents – from fresh and floral to spicy and woody.
- Essential Oils: Essential oils are natural components that not only add fragrance to products but also offer beneficial properties for the skin and hair. Our range includes lavender, mint, eucalyptus, lemon, and many other oils.
- Active Ingredients: Vitamins, antioxidants, hyaluronic acid, and other active ingredients help improve the properties of your cosmetics. We offer only tested and high-quality components.
- Pigments and Dyes: Give your products bright and lasting colors with our pigments and dyes. They are safe for the skin and suitable for use in soap, cosmetics, and candles.
- Emulsifiers and Thickeners: To create creams and lotions, you will need emulsifiers and thickeners. We offer quality ingredients that help you achieve the desired consistency and stability of the product.
- Soap and Candle Molds: Create unique items with our soap and candle molds. Our range includes molds of various sizes and designs.
- Everything for Candles: Wax, wicks, fragrances, and dyes for candles – we have everything you need to create beautiful and fragrant candles.
Recipes and Tips for Making Handmade Soap
Cold Process Soap for Beginners
Making cold process soap is an exciting process that allows you to control all the ingredients and create unique recipes. Here is one simple cold process soap recipe for beginners:
Ingredients:
- 500 g olive oil
- 300 g coconut oil
- 200 g palm oil
- 150 g castor oil
- 120 g lye (sodium hydroxide)
- 300 ml distilled water
- Essential oils (lavender, mint, eucalyptus)
- Pigments or natural dyes (optional)
Process:
- Prepare all ingredients and tools. Always use protective gloves and goggles, as lye can be dangerous.
- Weigh the lye and water. Slowly add the lye to the water, stirring until it fully dissolves. Allow the mixture to cool to 40-45°C.
- Weigh the oils and melt them in a water bath. When the oils and lye solution reach the same temperature (about 40-45°C), slowly pour the lye into the oils, stirring constantly.
- Use an immersion blender to mix until trace (when the mixture thickens and leaves a trail when stirred).
- Add essential oils and pigments if desired. Mix thoroughly.
- Pour the mixture into a prepared mold and cover with a towel. Let the soap harden for 24-48 hours.
- Remove the soap from the mold and cut it into bars. Allow the soap to cure for 4-6 weeks before use.
Homemade Cosmetics Recipes
DIY Moisturizing Cream
Creating a moisturizing cream at home allows you to control the ingredients and adapt the recipe to your needs. Here is a simple recipe for a moisturizing cream:
Ingredients:
- 50 ml rose water
- 50 ml distilled water
- 10 g emulsifier (e.g., Olivem 1000)
- 10 ml jojoba oil
- 5 ml avocado oil
- 5 drops lavender essential oil
- 2 drops tea tree essential oil
Process:
- Weigh all the ingredients.
- In a water bath, melt the emulsifier with the oils until smooth.
- Separately, heat the water phase (rose water and distilled water) to the same temperature as the oil phase.
- Slowly pour the water phase into the oil phase, stirring constantly.
- Use an immersion blender to emulsify until you achieve a creamy consistency.
- Add essential oils and mix thoroughly.
- Pour the cream into a sterilized jar and allow it to cool.
DIY Candle Recipes
Aromatic Soy Candle
Creating aromatic candles is a creative process that allows you to experiment with scents and designs. Here is a simple recipe for a soy candle:
Ingredients:
- 200 g soy wax
- 20 ml fragrance oil (e.g., vanilla or lavender)
- Wick for candles
- Dyes (optional)
- Glass or metal candle mold
Process:
- Melt the soy wax in a water bath until liquid.
- Add the fragrance oil and dyes if desired. Mix thoroughly.
- Secure the wick in the center of the candle mold.
- Slowly pour the melted wax into the mold, holding the wick.
- Allow the candle to fully harden (about 24 hours).
- Trim the wick to the desired length and enjoy your aromatic candle.
Tips for Beginners in Cream Making
- Learn the Basics: Before starting to create creams, it is important to learn the basic principles and ingredients used in cream making.
- Experiment with Formulas: Do not be afraid to experiment with different ingredients and proportions to find the perfect formula for your skin.
- Use Quality Ingredients: The effectiveness and safety of your product depend on the quality of the ingredients. Always choose tested and natural components.
- Maintain Hygiene: It is important to maintain cleanliness and sterility when creating cosmetics to avoid contamination and spoilage of the product.
- Start with Simple Recipes: For beginners, it is best to start with simple recipes to master the basic techniques and principles of cream making.
Conclusion
Our Mylo Opt cosmetics blog is your reliable source of information and inspiration in the world of natural cosmetics. We share useful tips, tested recipes, and the latest news to help you create quality and effective products for skin, hair, and home care. Subscribe to our blog, follow the updates, and discover new opportunities in the world of natural cosmetics with Mylo Opt!


